Mounting and dismounting
The section describes how to dismount HiPERCAM and its mounting collar from the GTC. Click on the photos below for larger images. It does not yet include a description of how to remove the cable twister or electronics cabinet. To mount HiPERCAM and its mounting collar on the GTC, perform the tasks below in reverse order, taking care to ensure the white alignment stickers on the rotator, mounting collar and HiPERCAM are all lined up.
- Before starting this procedure, it is assumed that the HiPERCAM CCDs have been warmed up and all cables removed from both the instrument and the electronics cabinet.
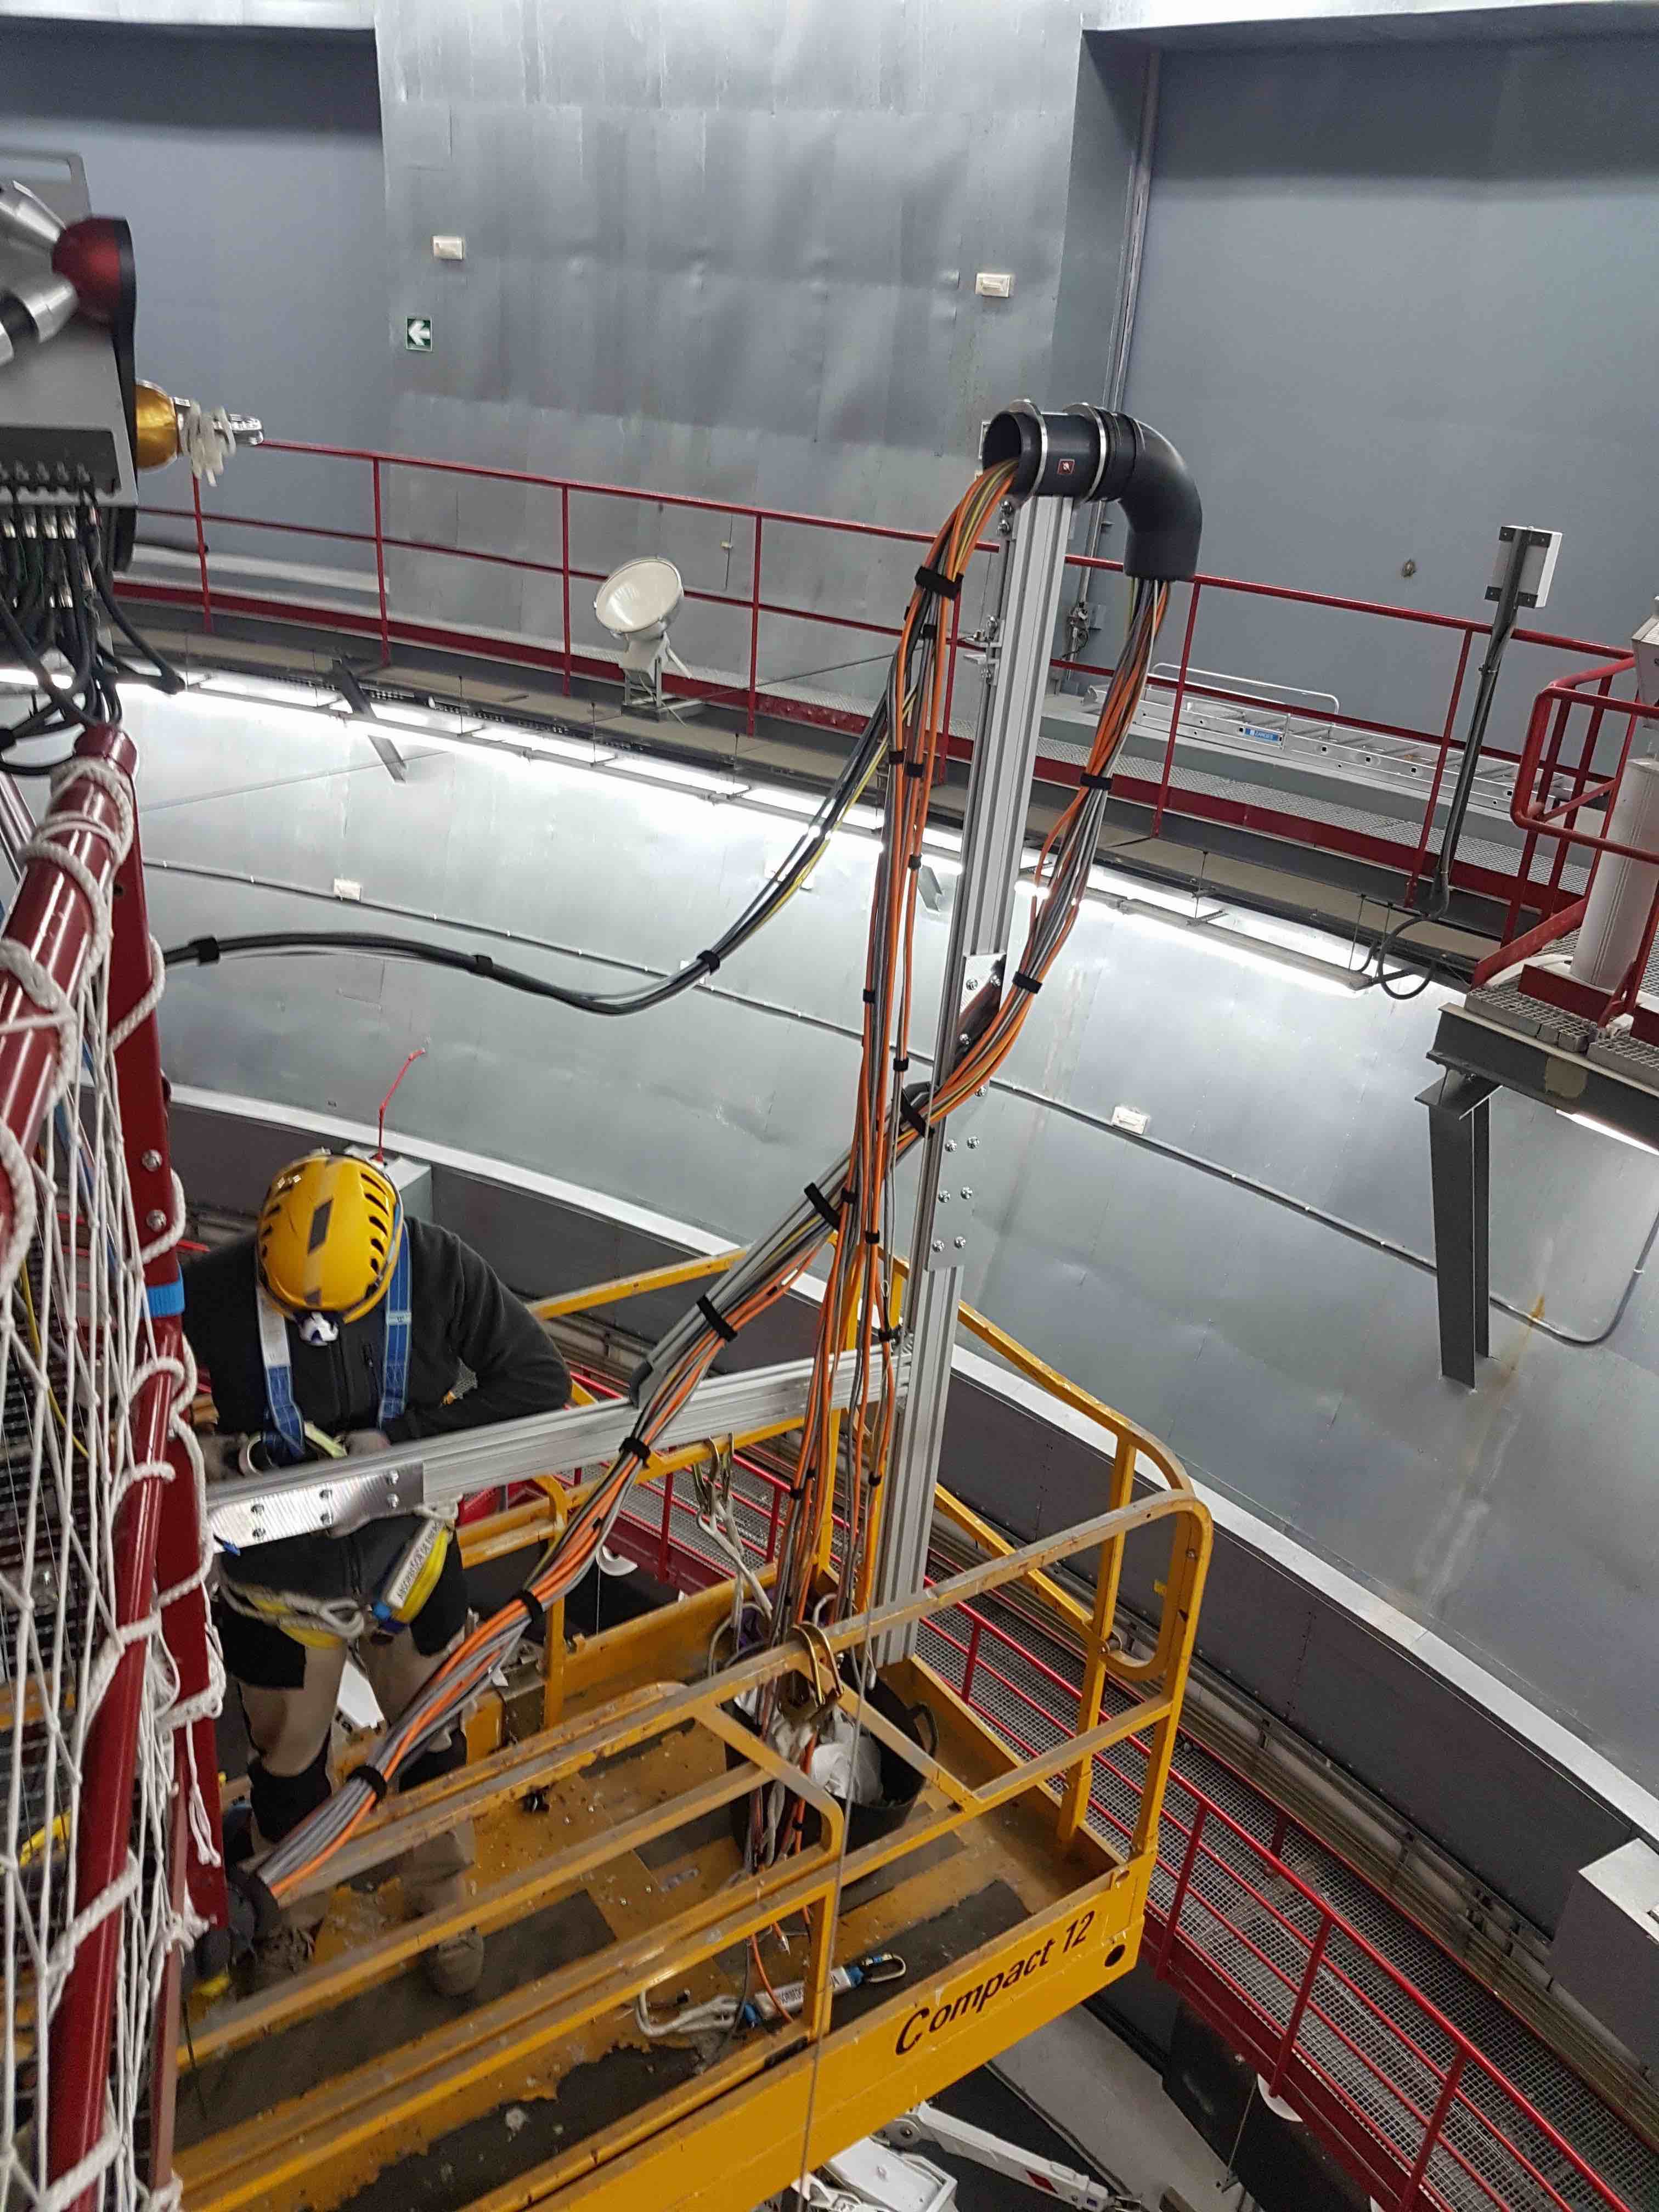
- Use the scissor lift to attach the free cables securely to the cable-twister post at one end, and underneath the walkway beneath the cabinet at the other end. Ensure the ends of the cables are protected.
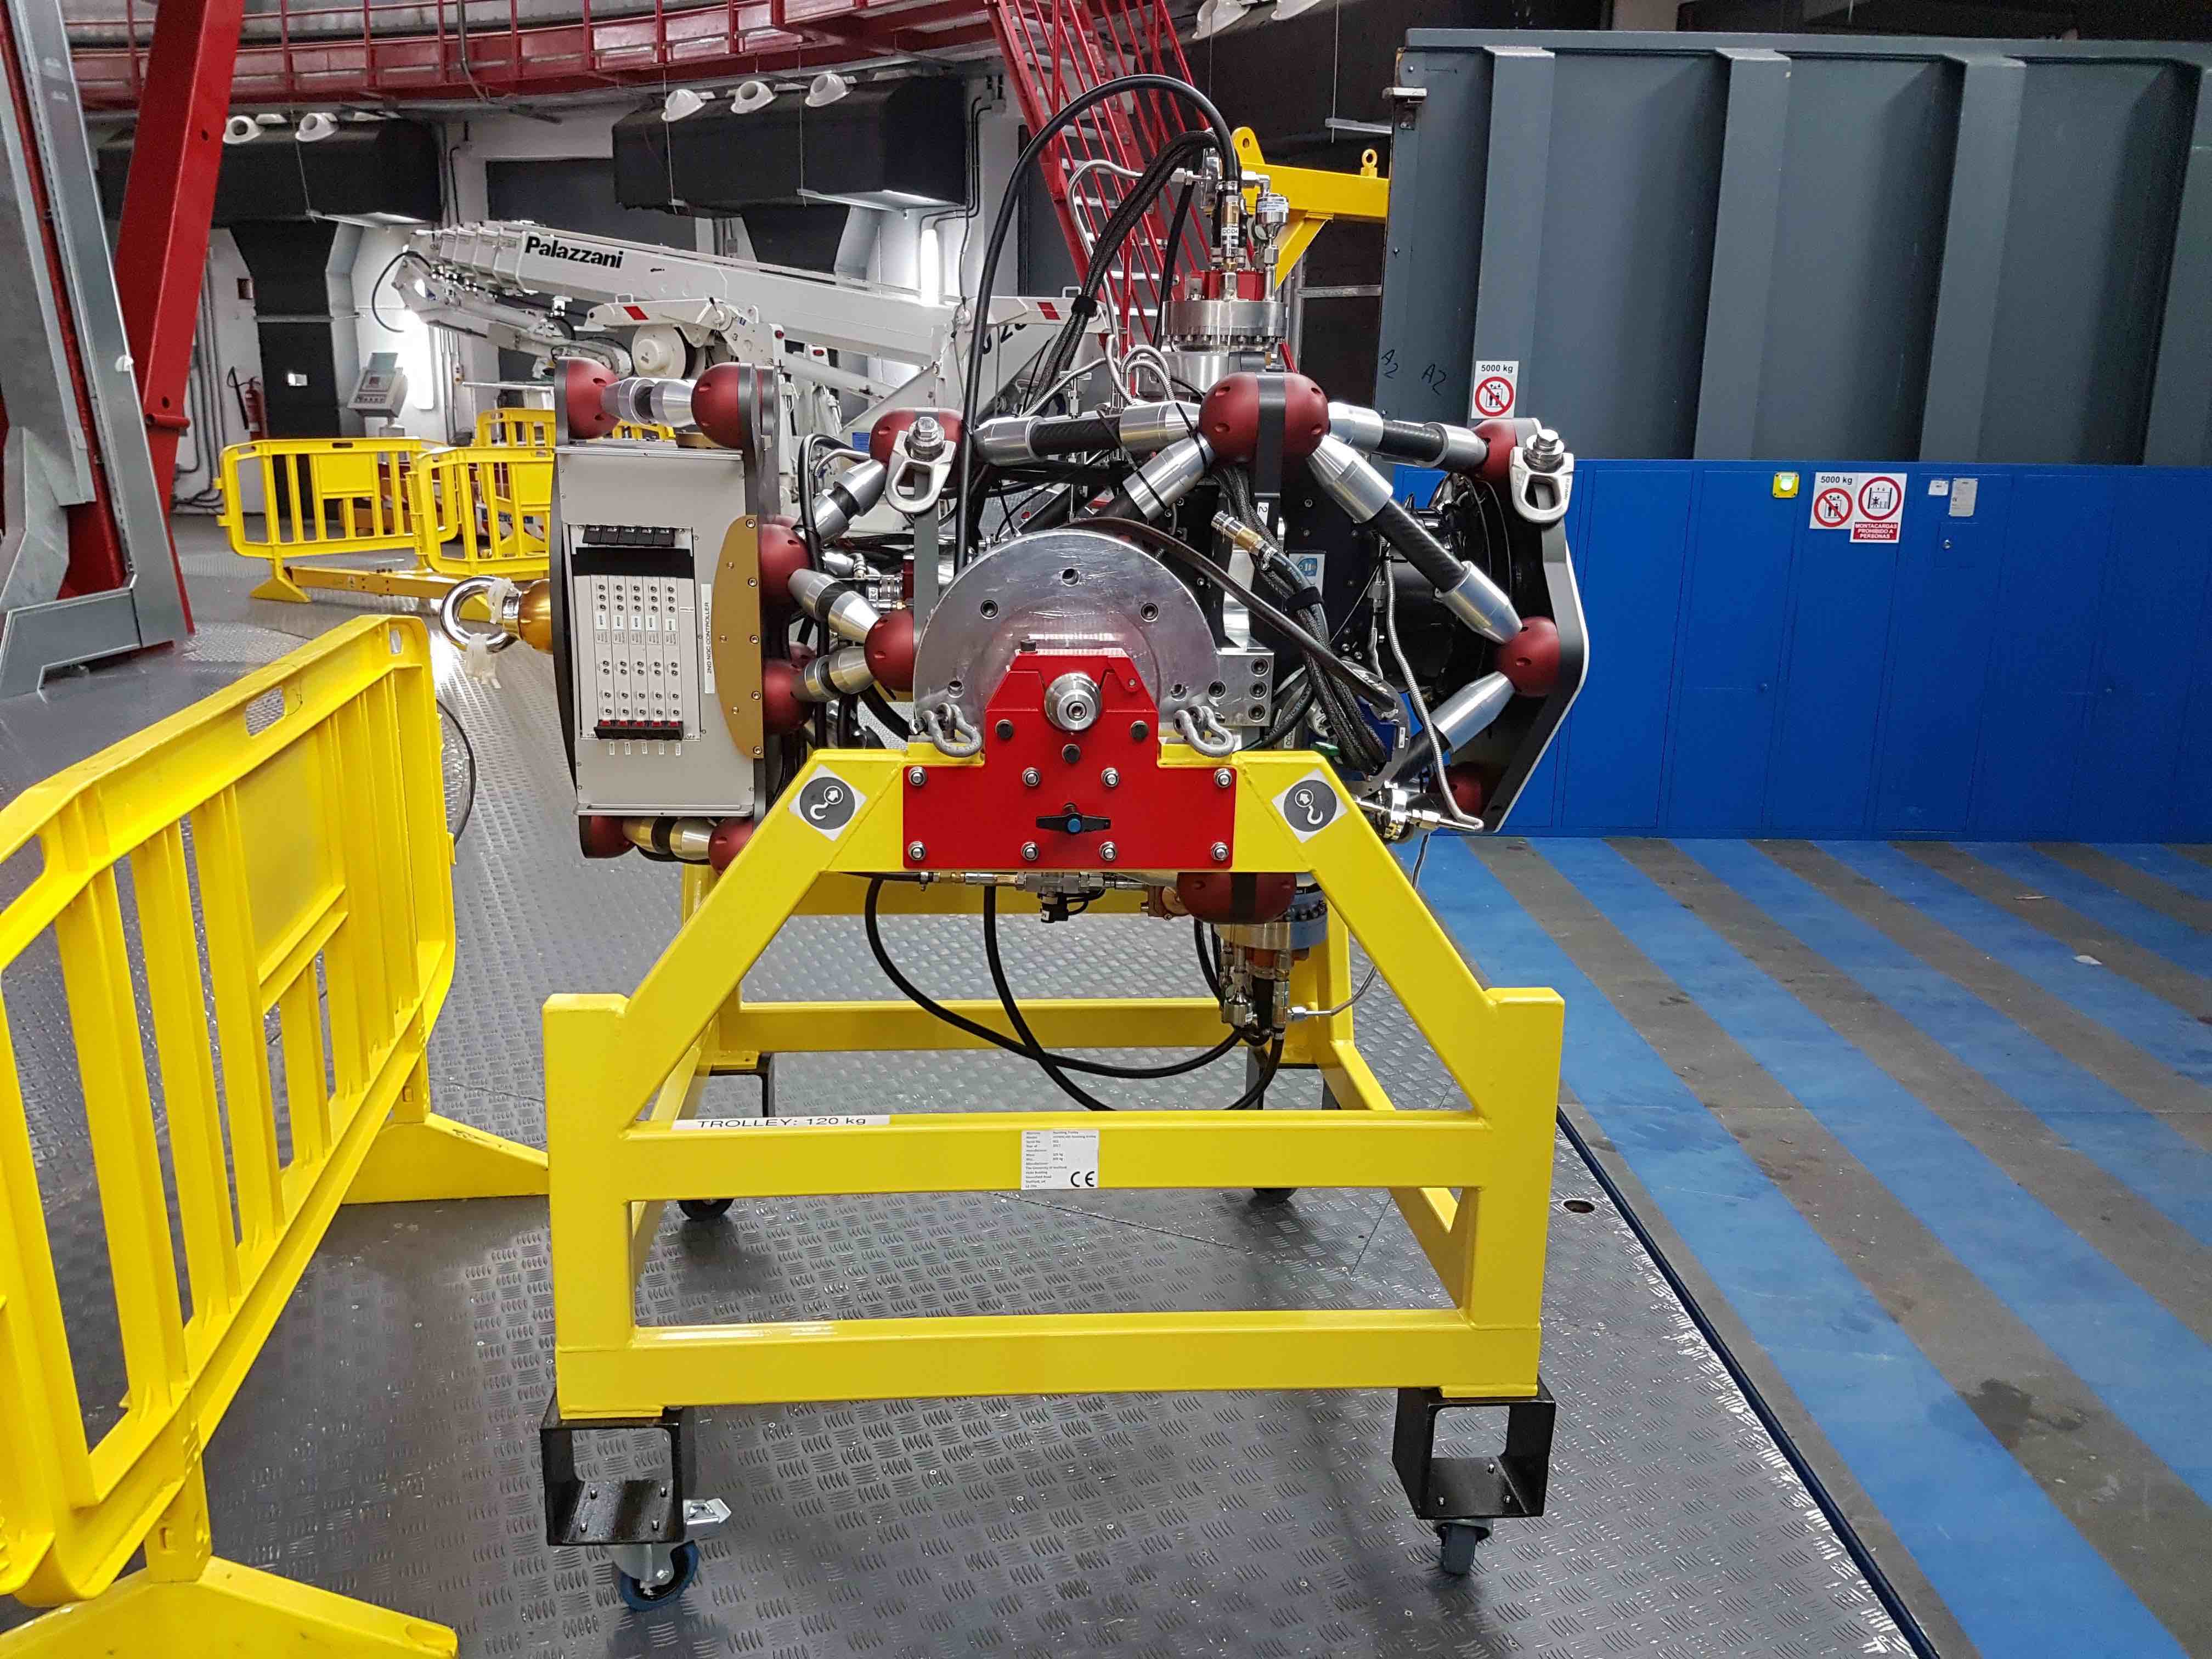
- Attach the two axles for the handling trolley to the middle plate of HiPERCAM. They are numbered “1” and “2” with stickers on both the axles and the middle plate - make sure the numbers match.
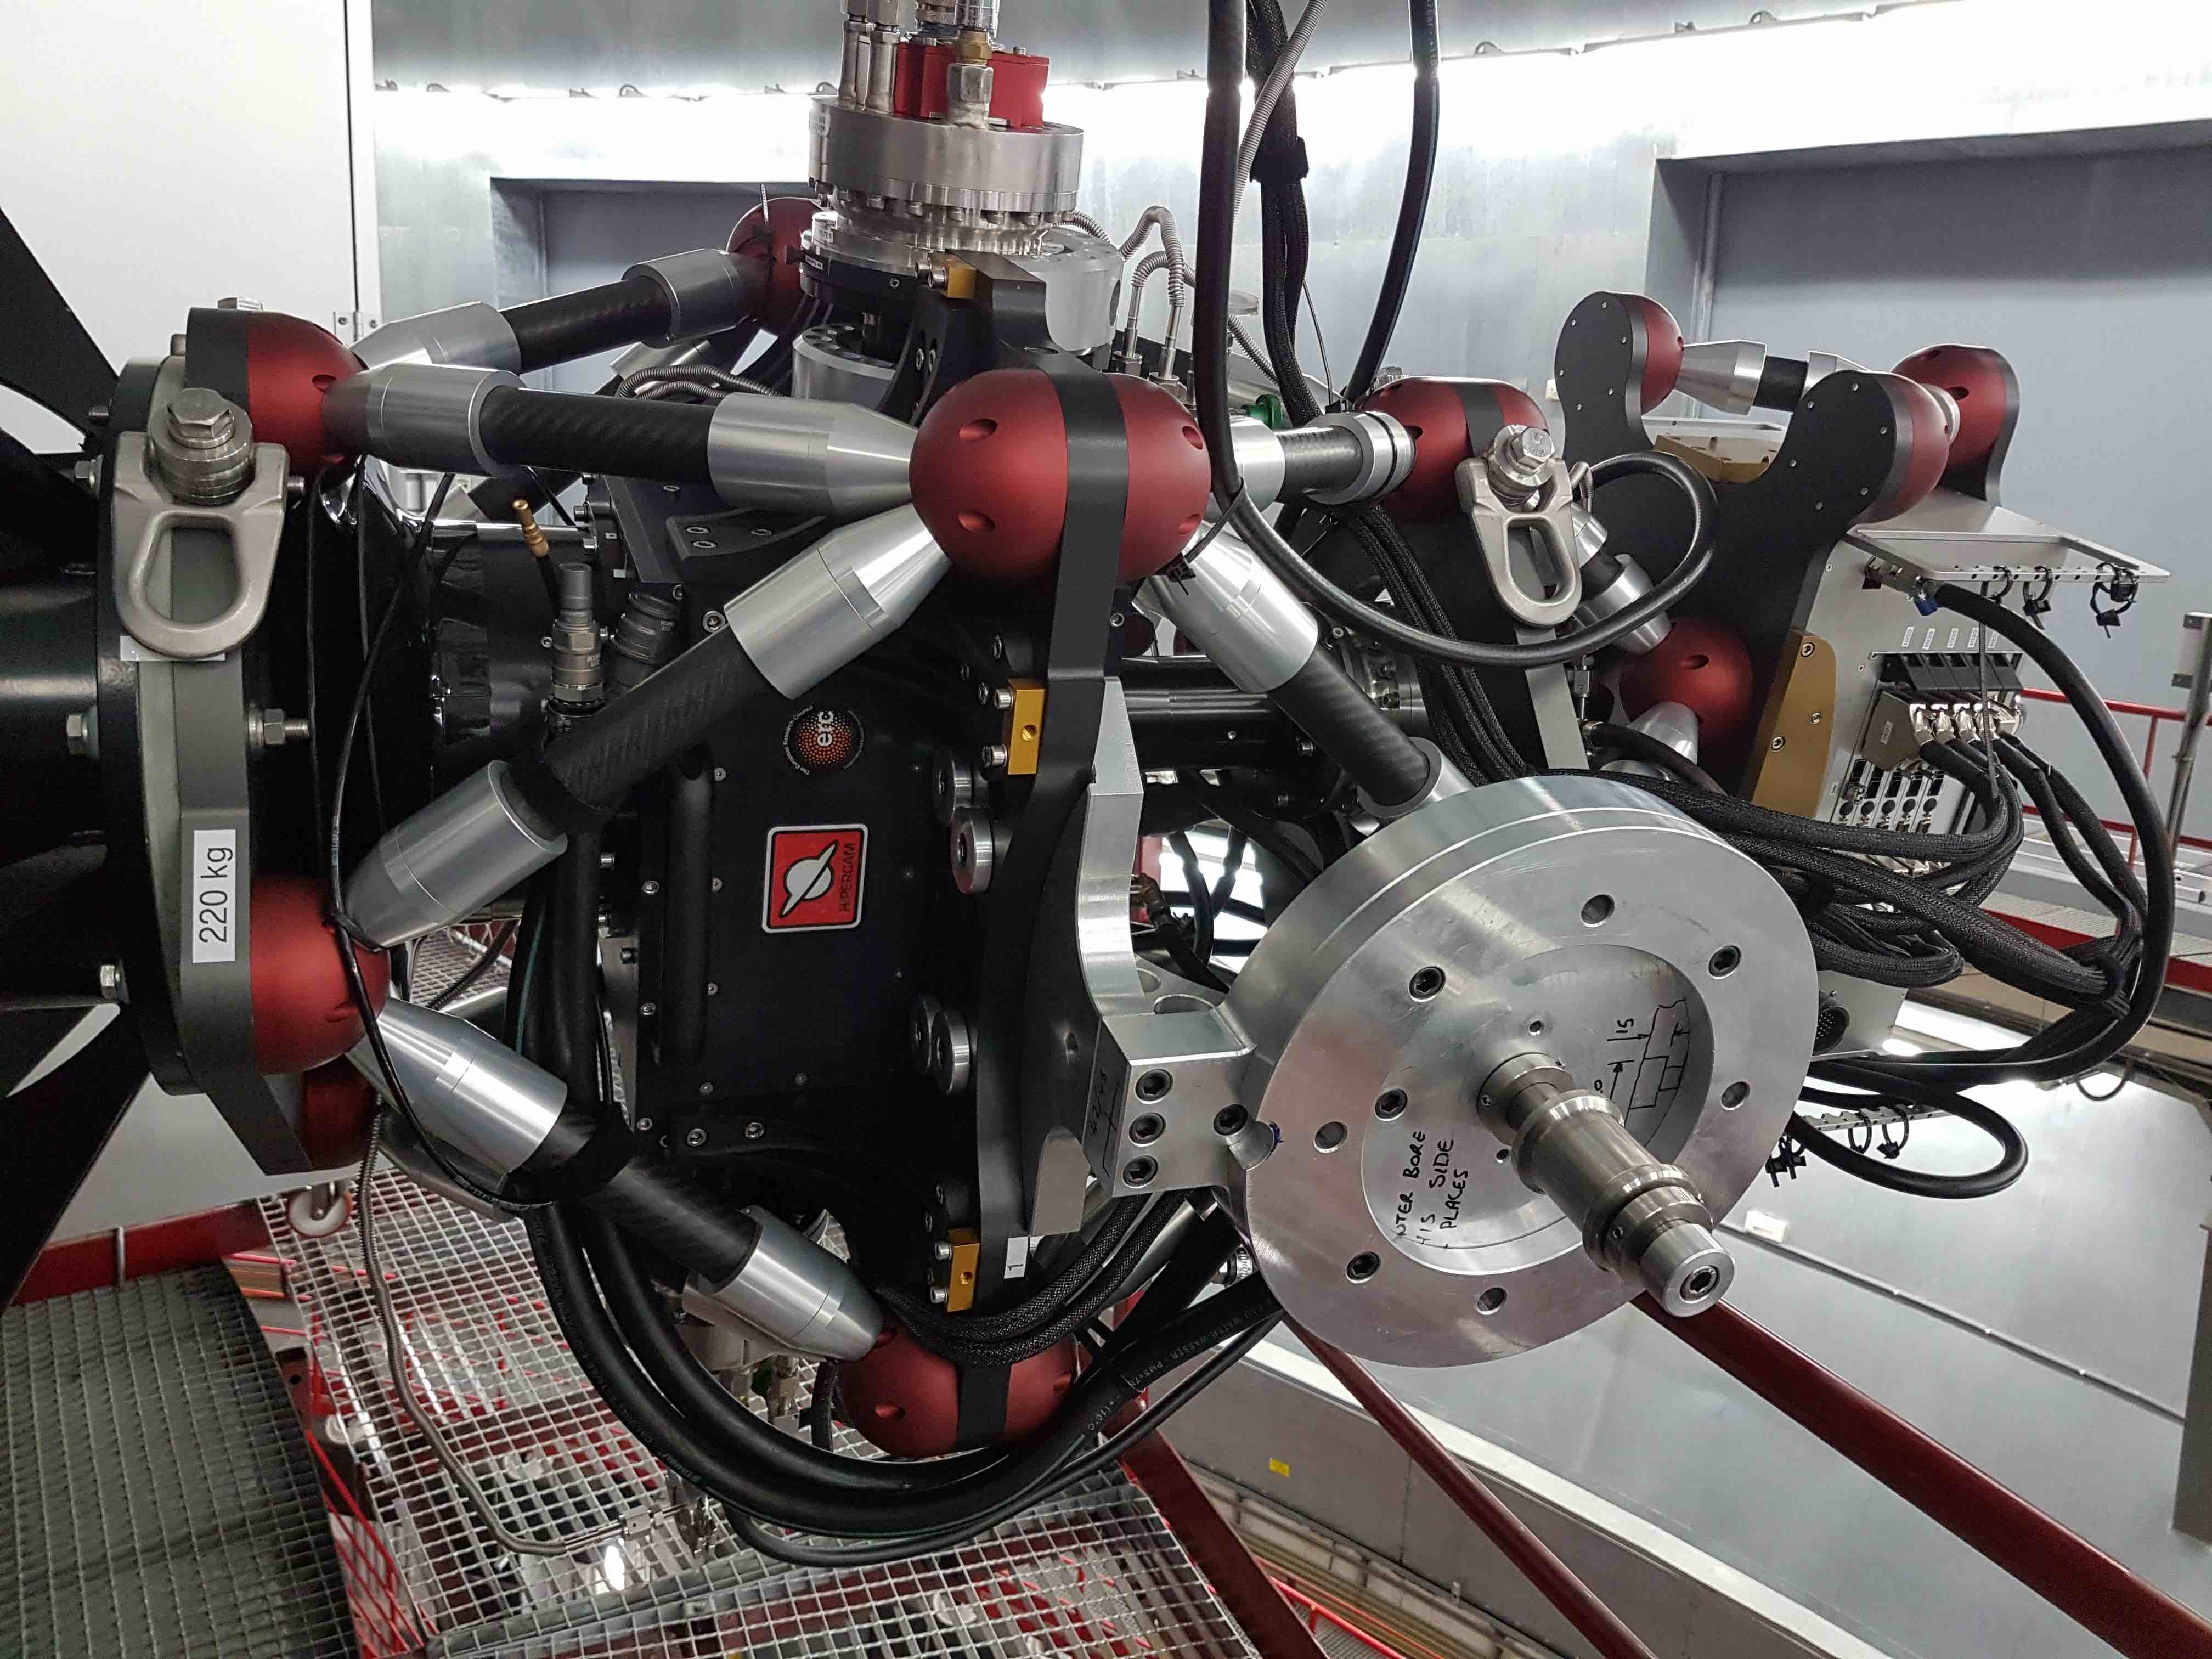
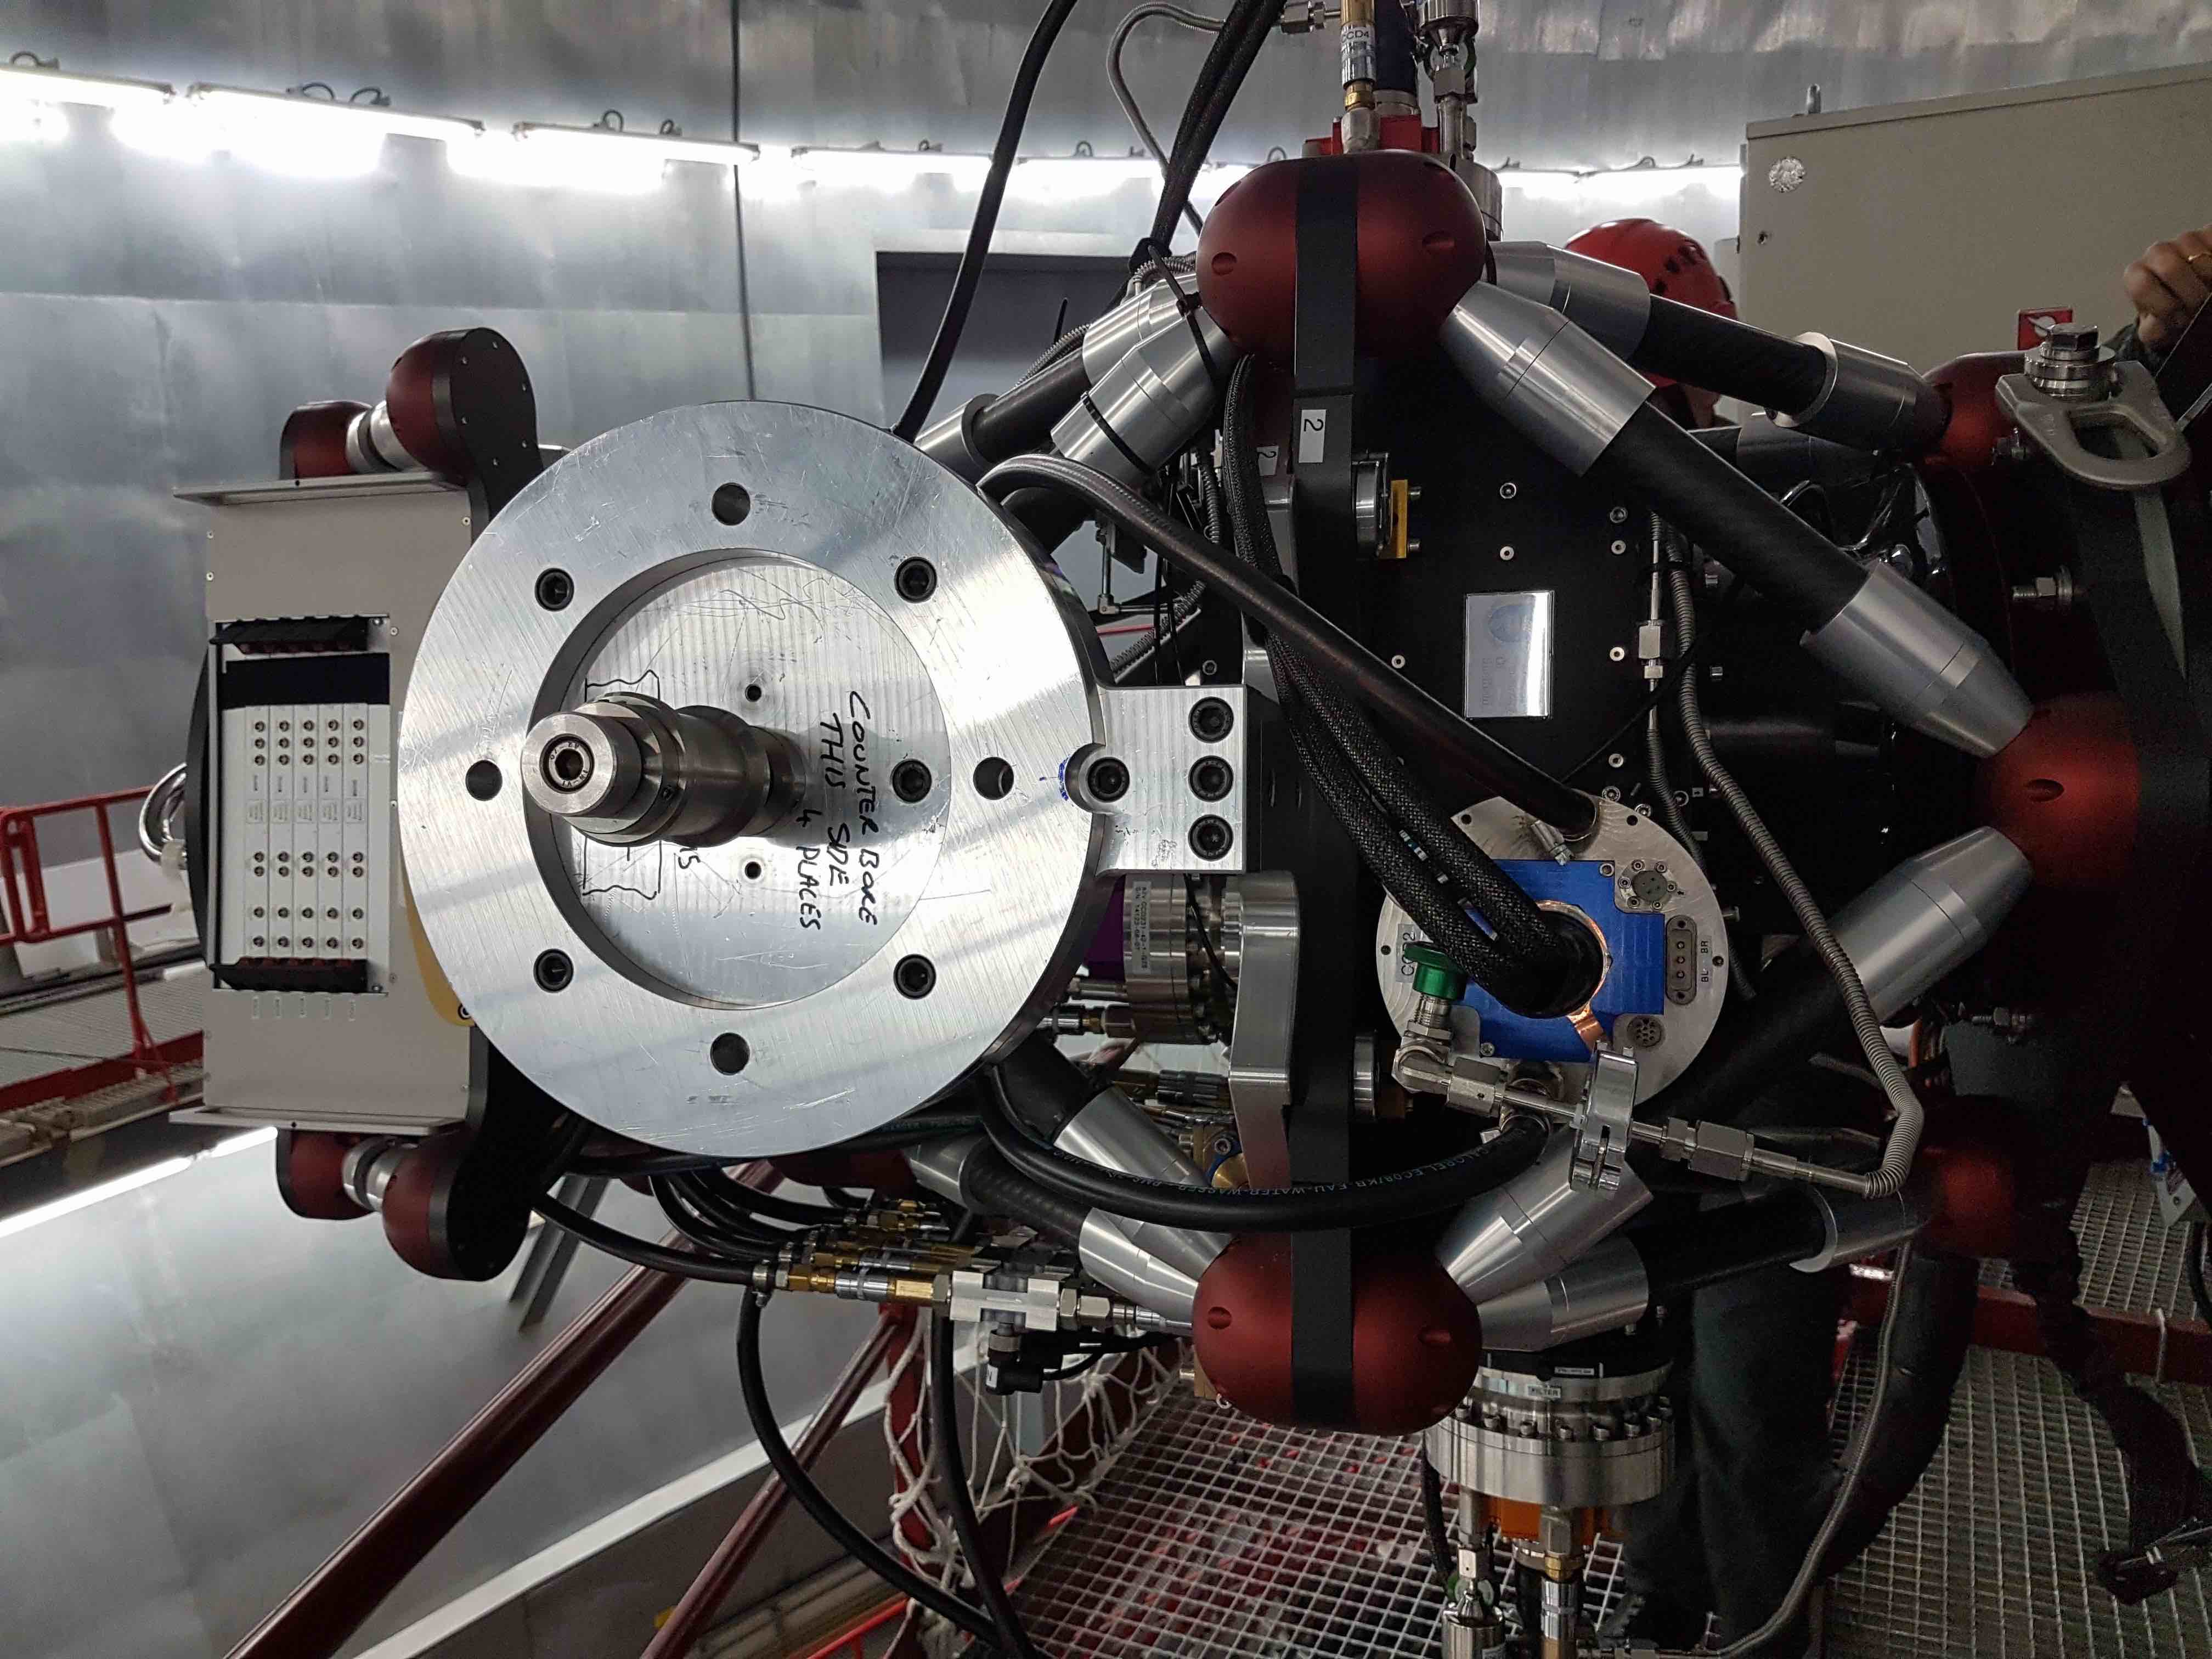
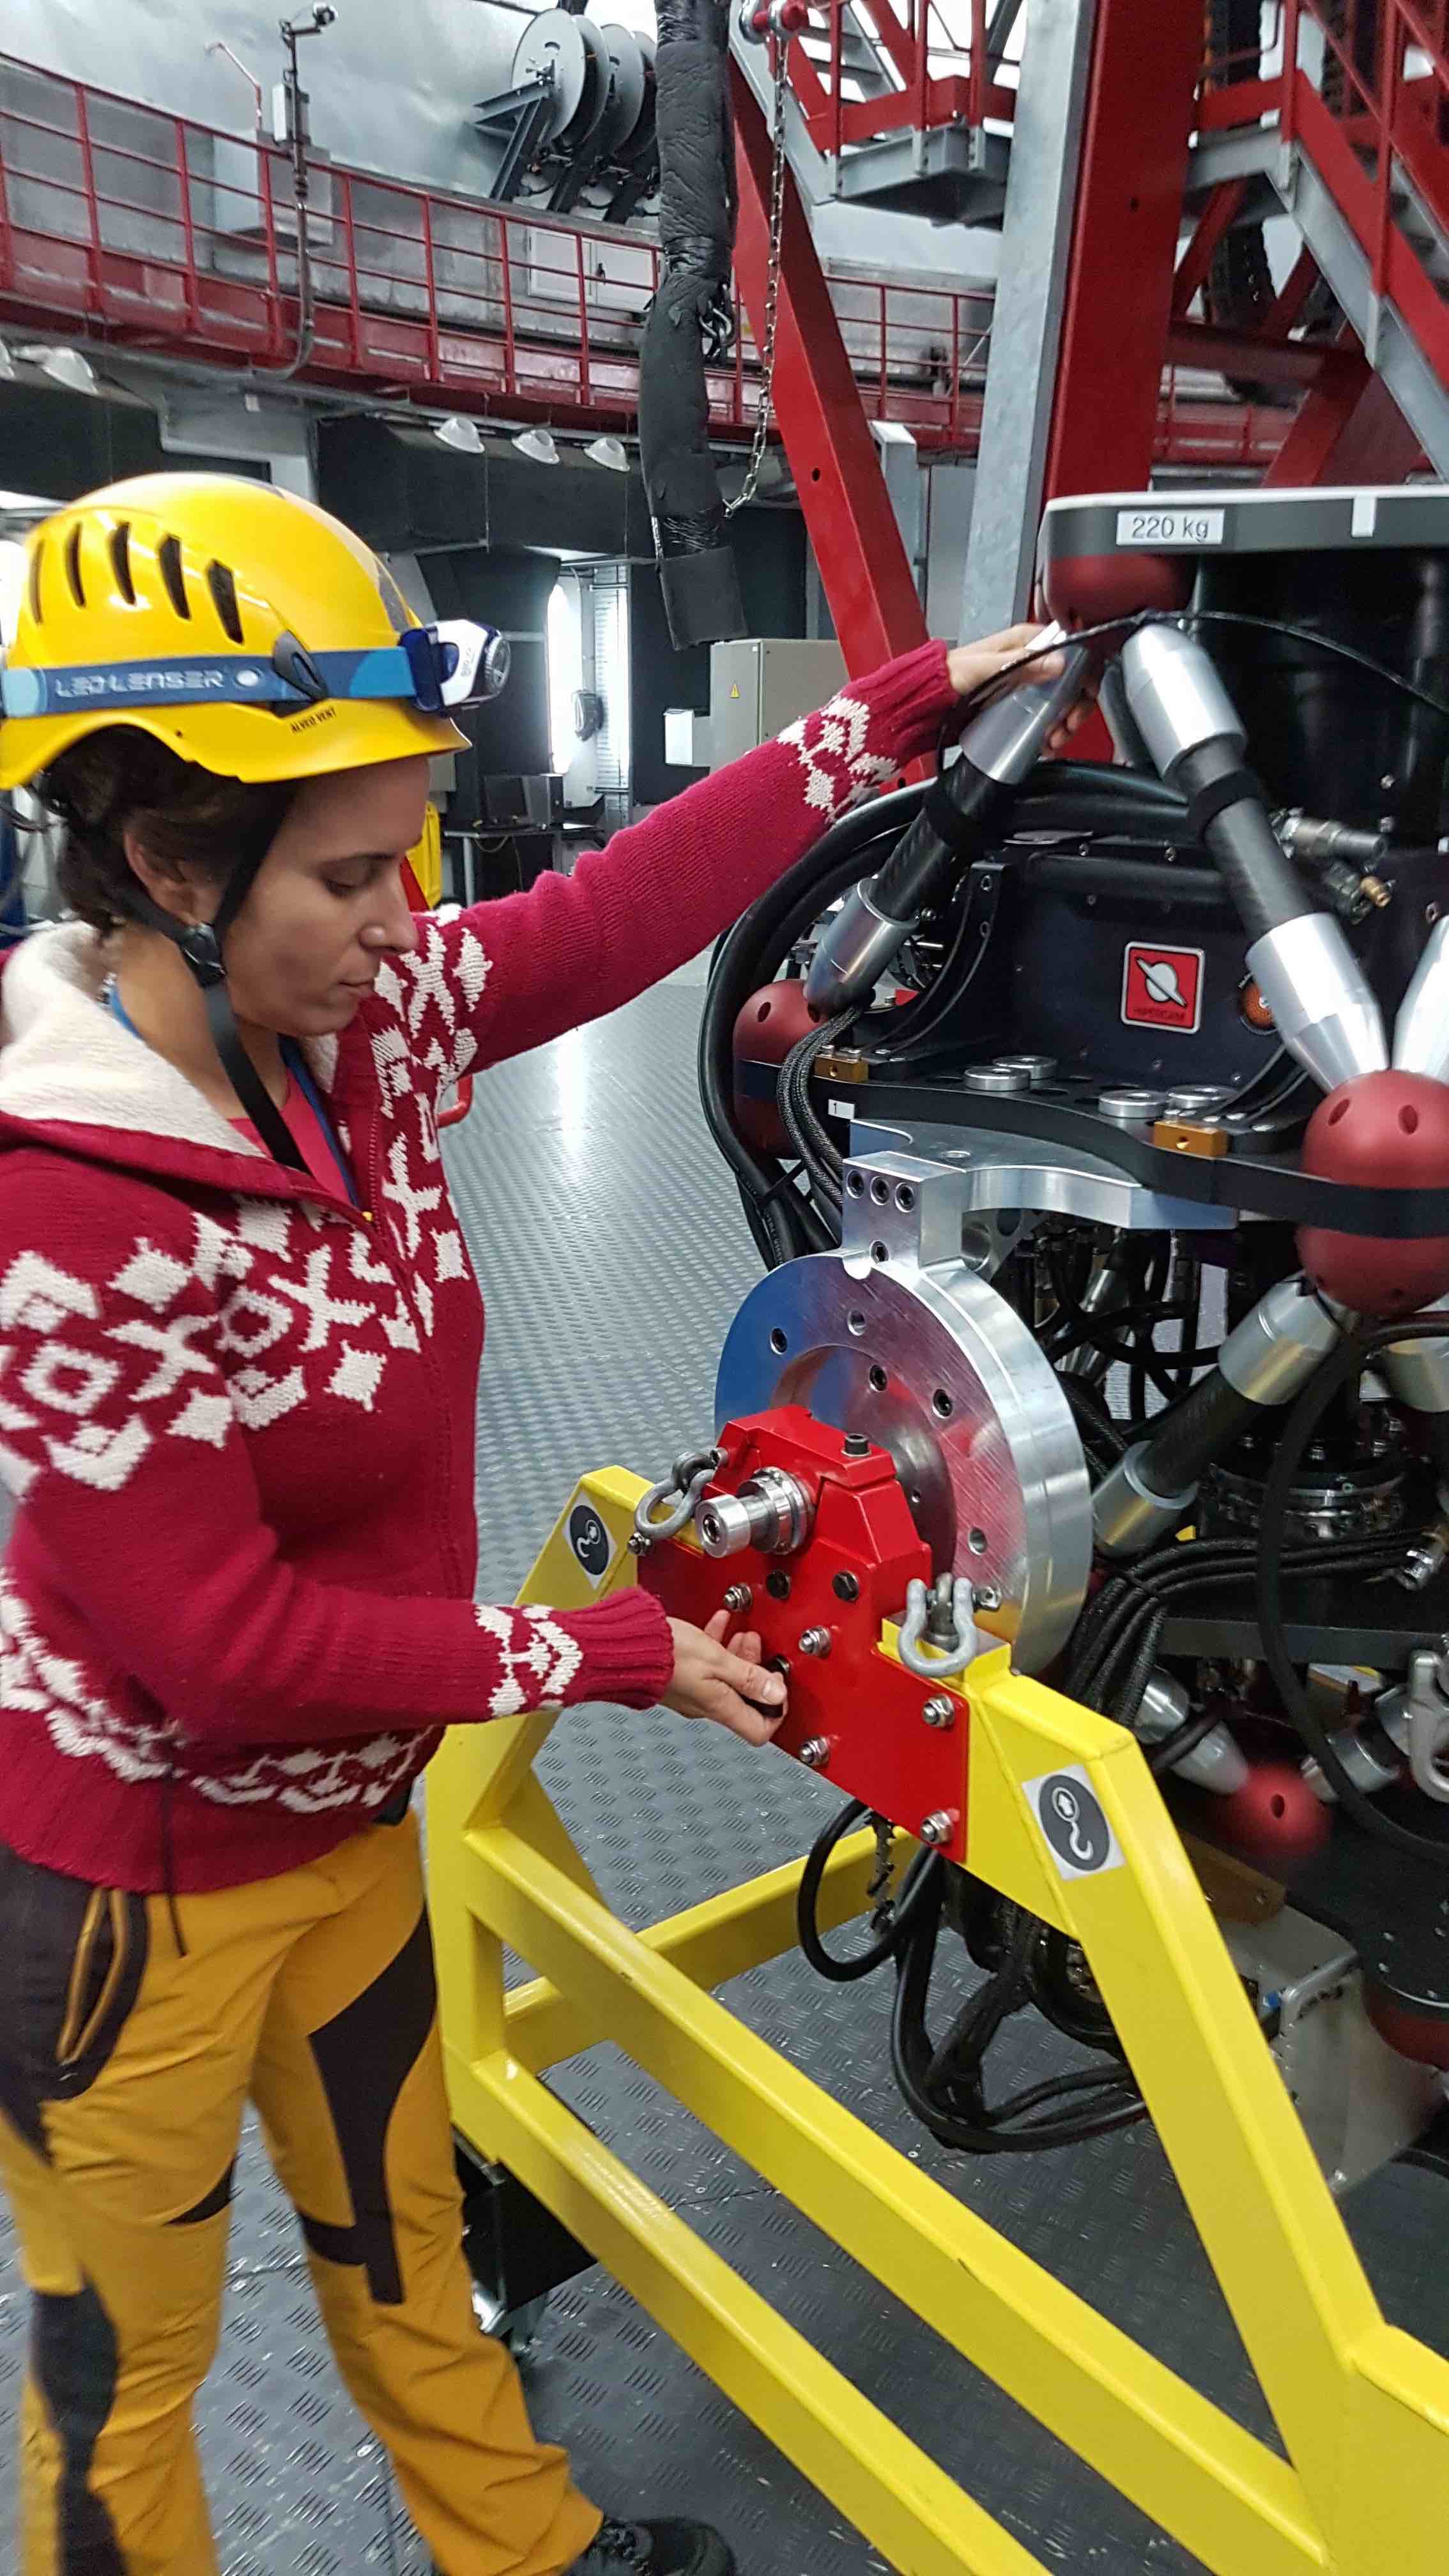
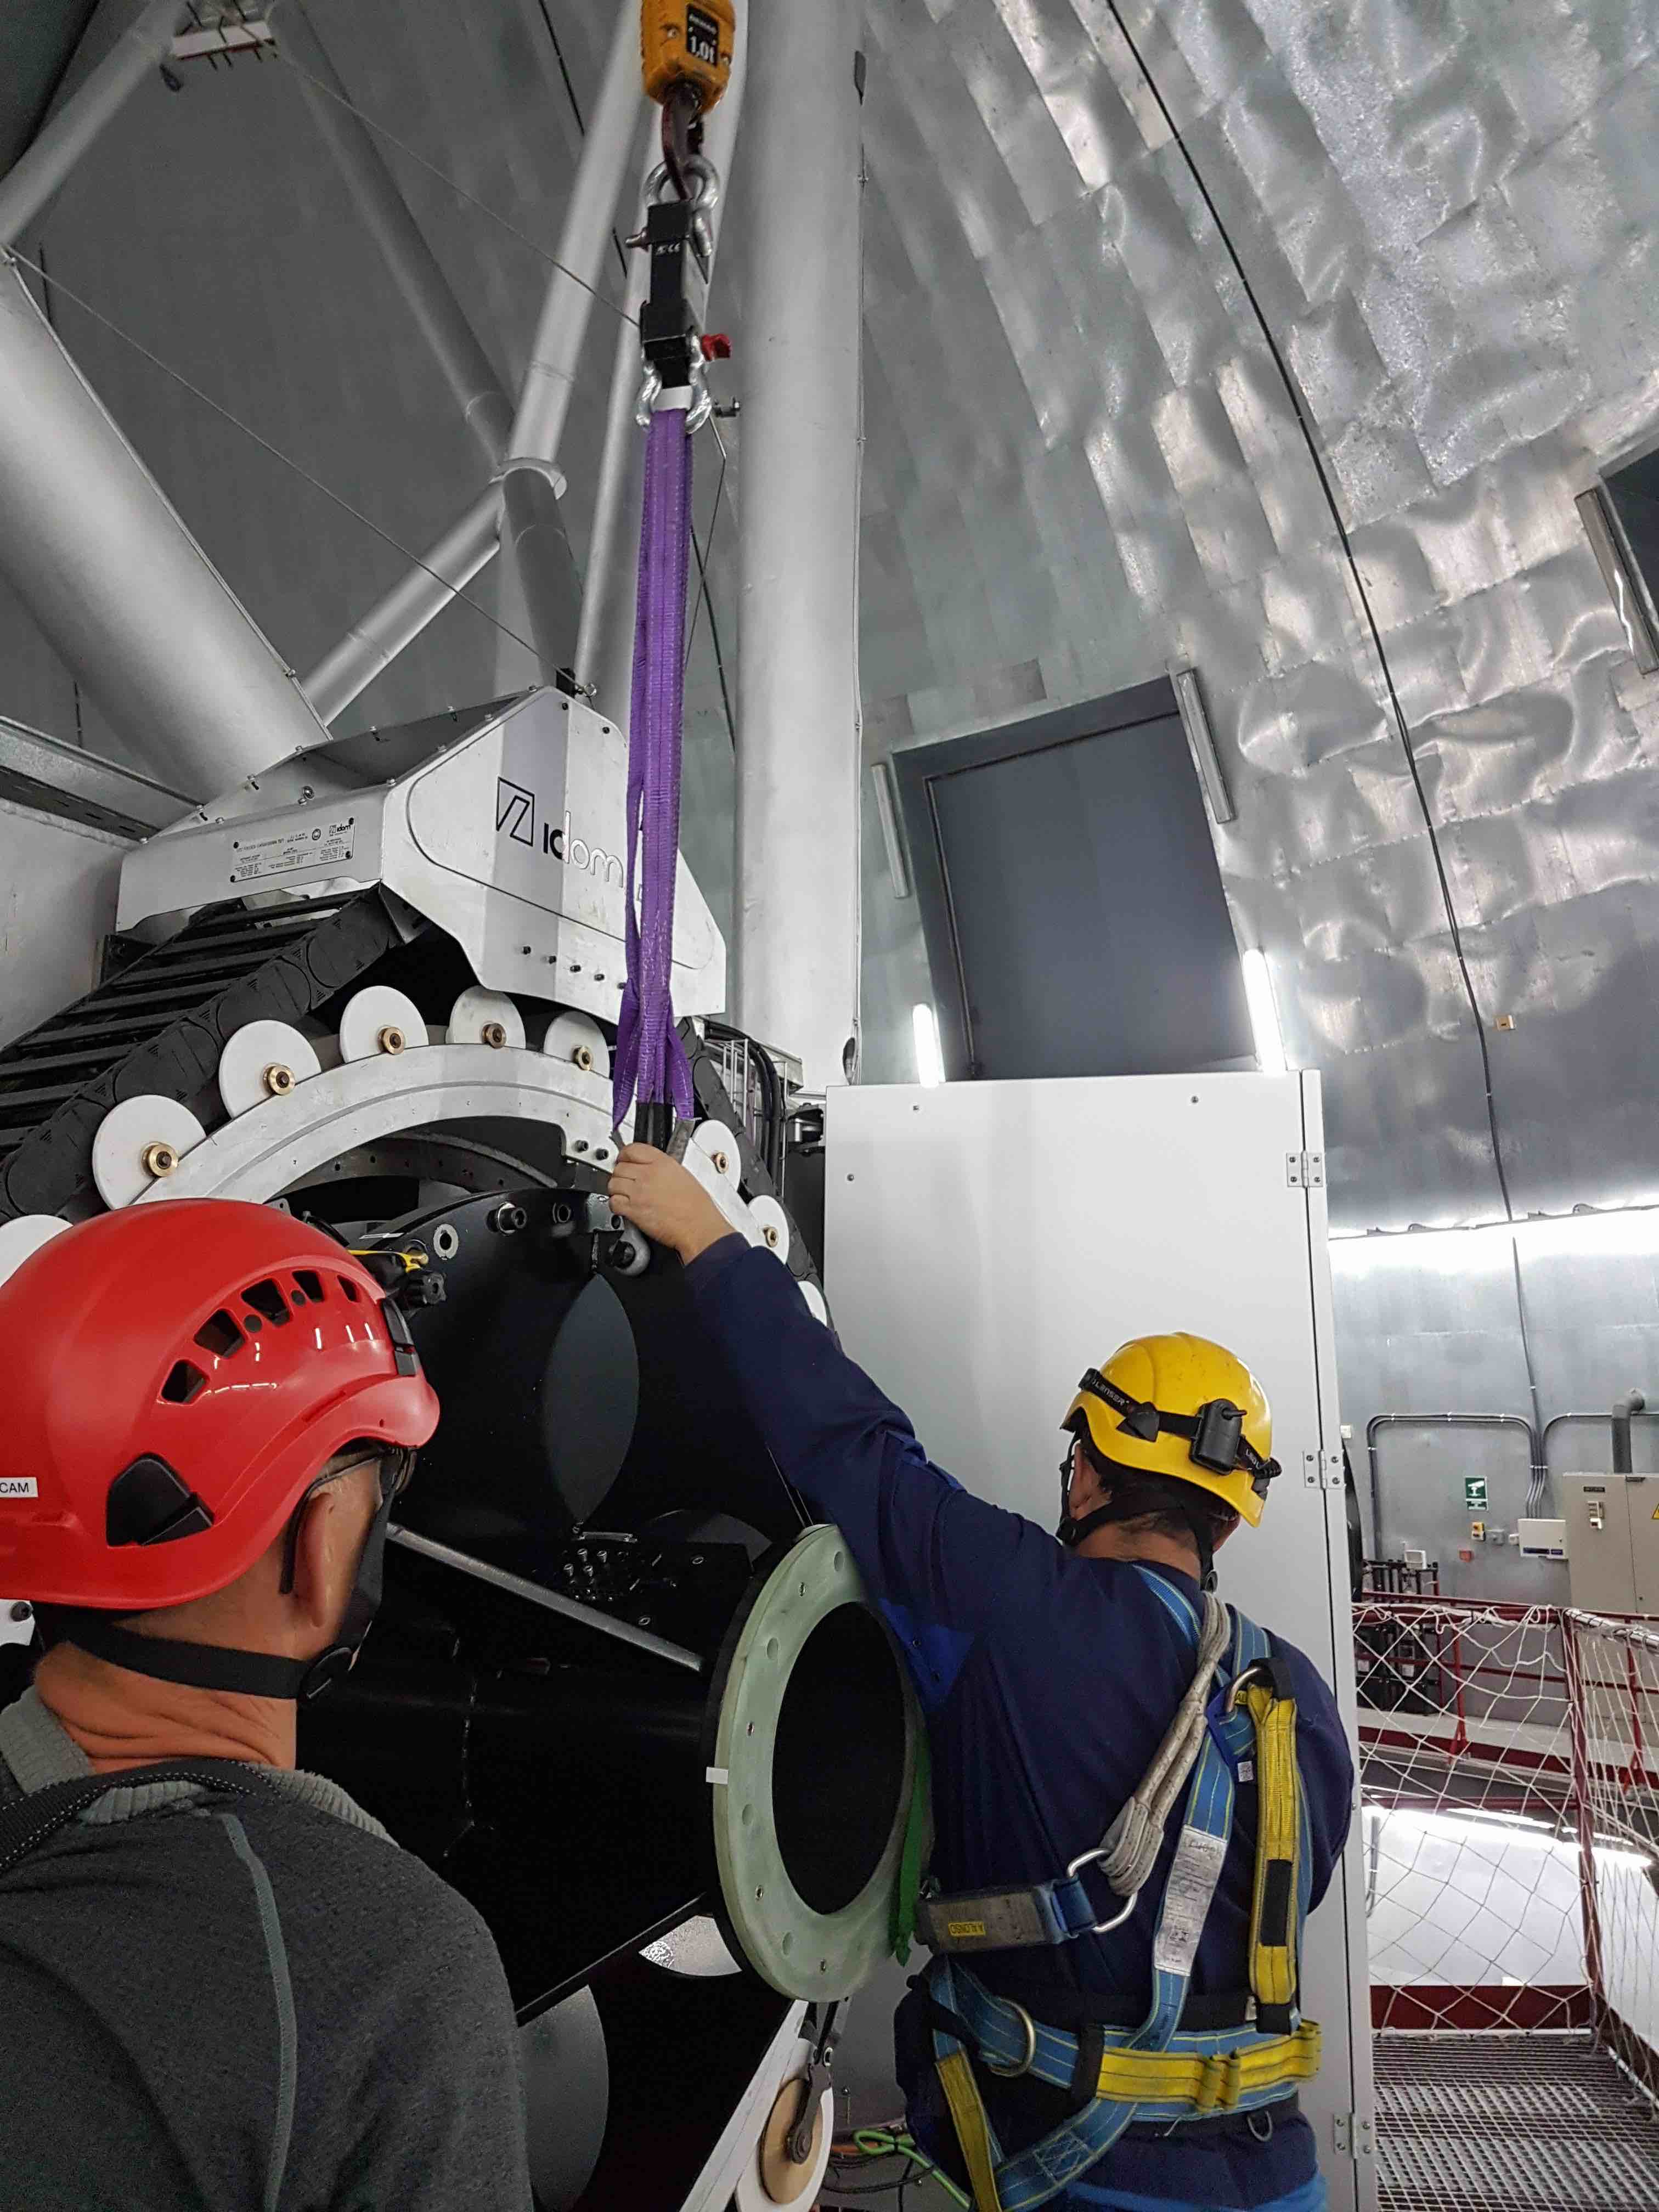
- Rotate HiPERCAM on the rotator until the 4 fixing holes for the swivel eyelets are uppermost. Attach the 4 swivel eyelets - these can be seen in the above photos.
- Attach one sling to each eyelet using a shackle and attach the other end of the slings to the scales, which is itself attached to the hook on the main dome crane.
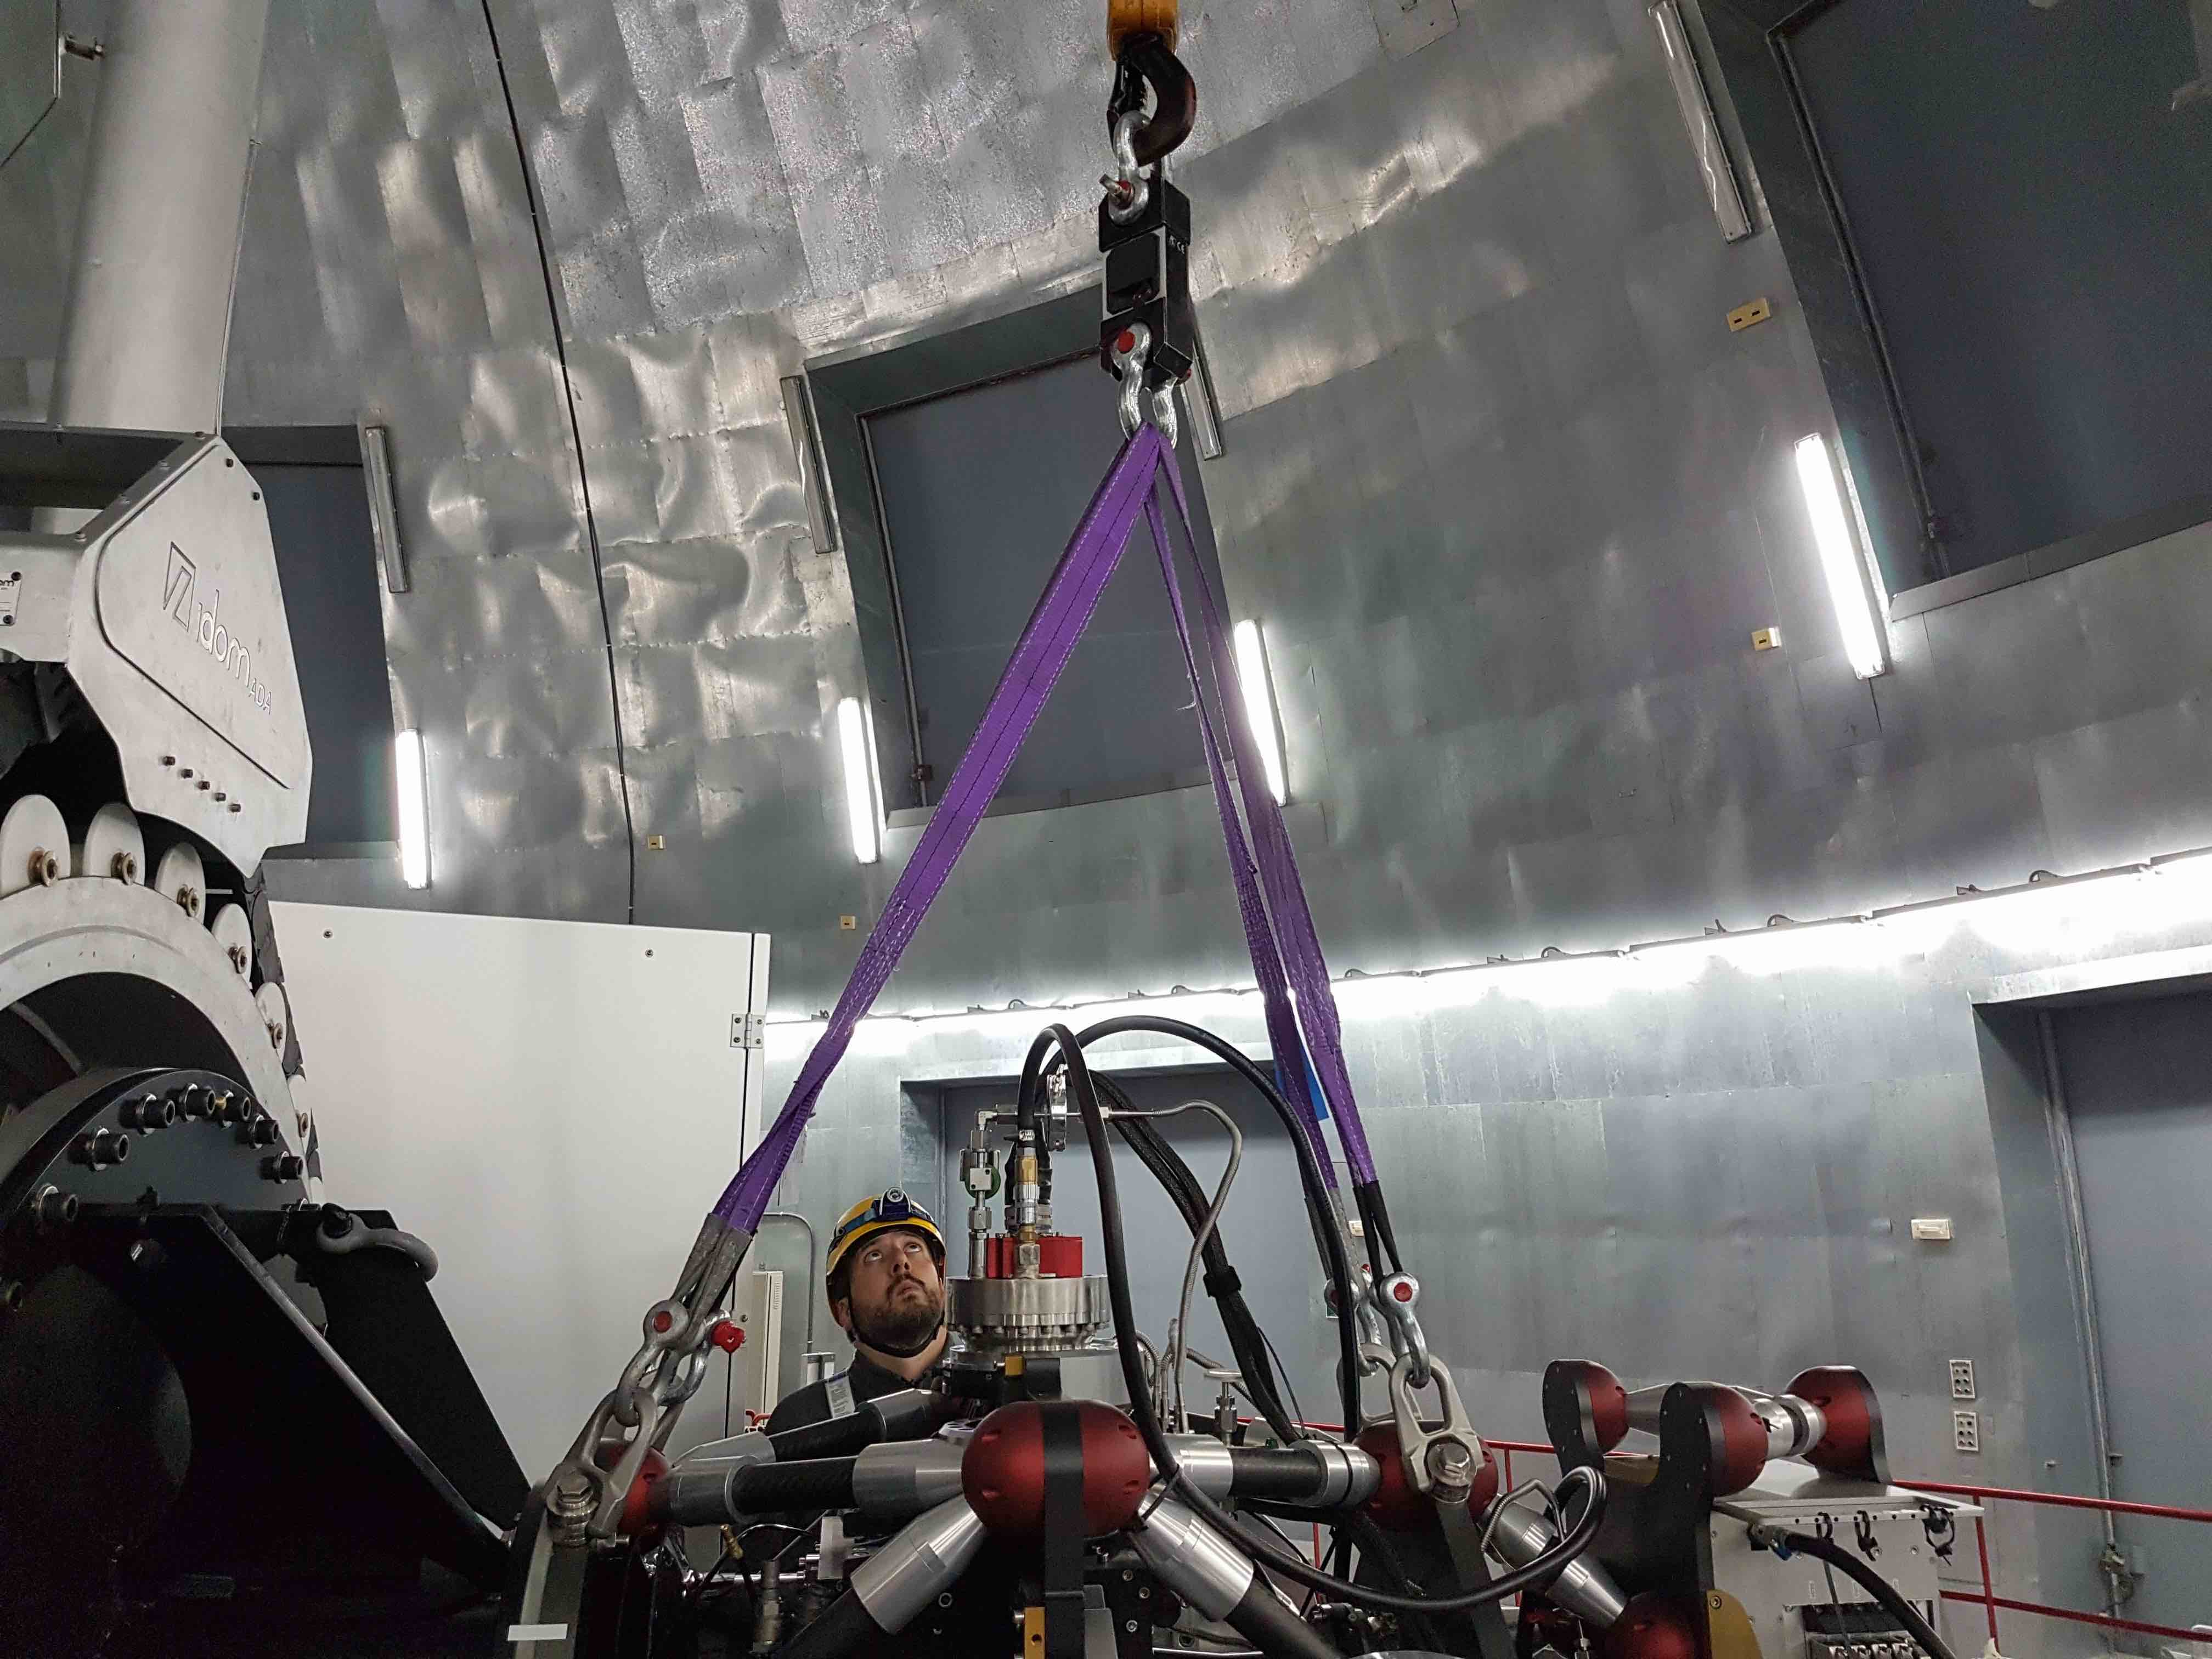
- Raise the crane until the weight indicated on the scales is equal to the weight of HiPERCAM. The weight of HiPERCAM is given by a sticker on the top plate. This ensures that HiPERCAM does not suddenly jolt downwards when the last bolt is removed.
- Remove the bolts attaching HiPERCAM to its mounting collar, ensuring the nuts, bolts, washers and insulation bushes are all placed in the correctly-labelled bag in the HiPERCAM bolts box.
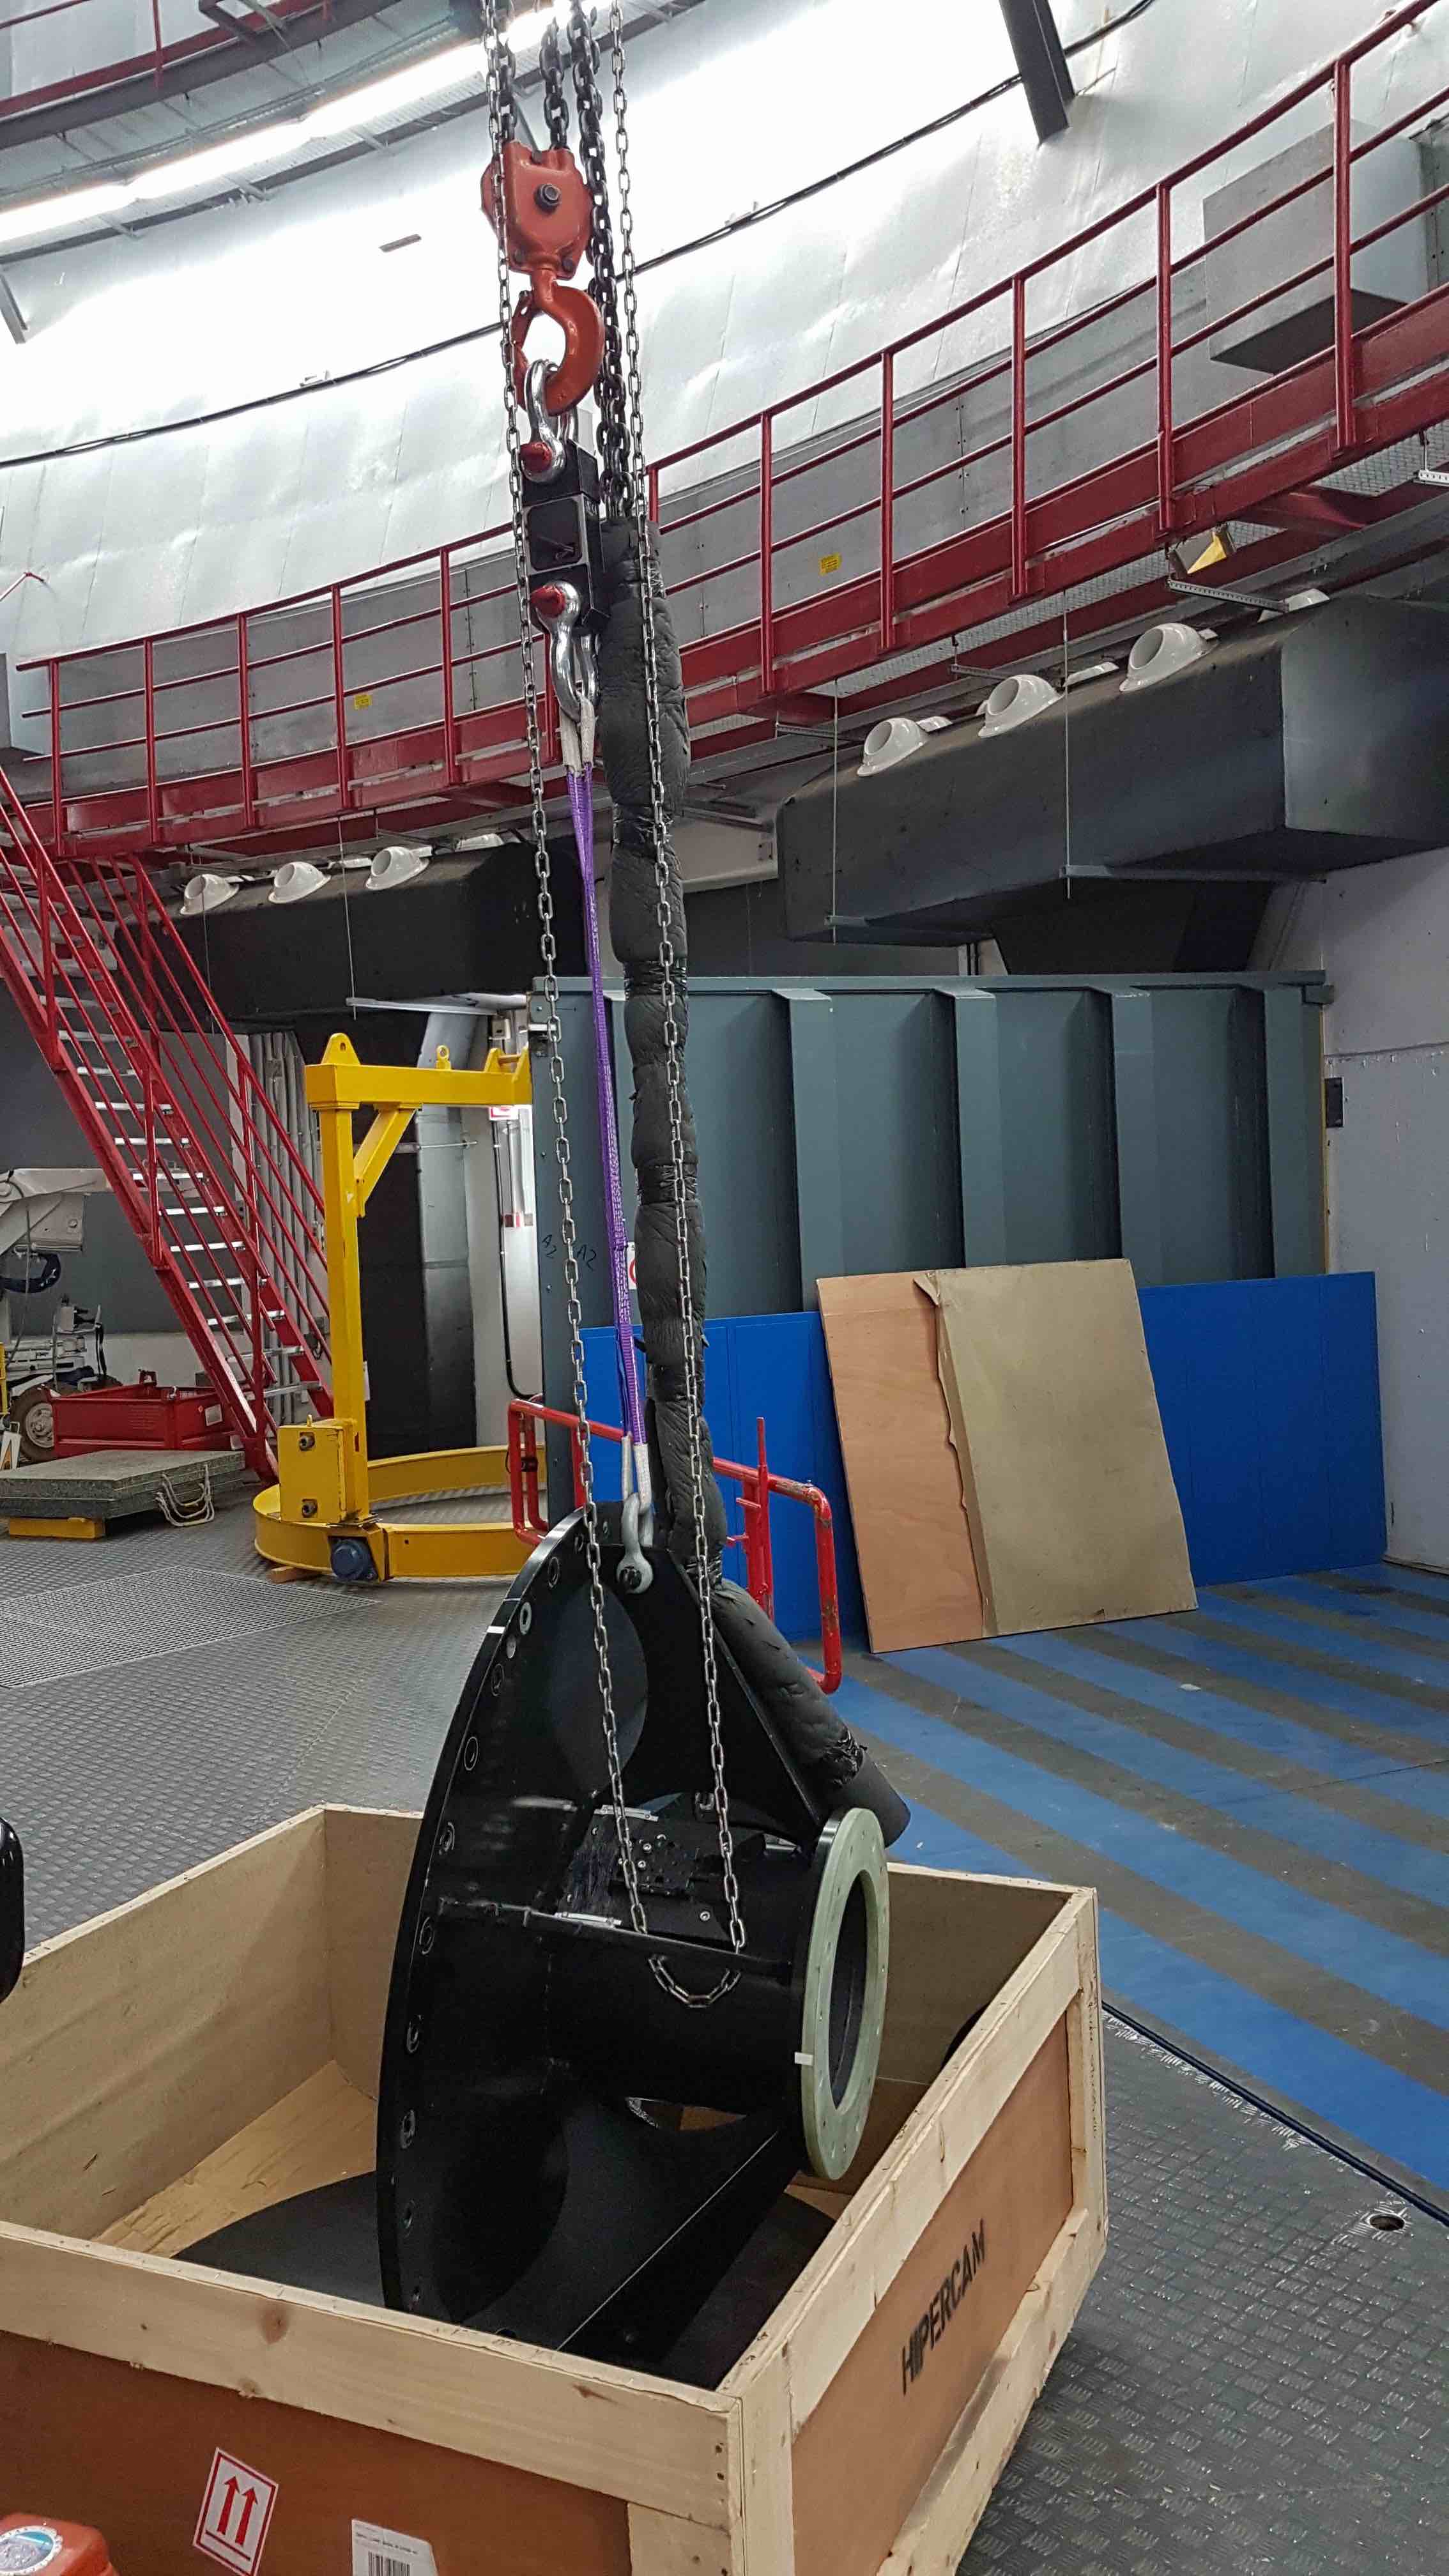
- When the bolts are all removed, and HiPERCAM’s weight is being entirely held by the crane, move HiPERCAM away from its mounting collar and bolt the white protective cover onto the face of its top plate. This protects the collimator from damage.
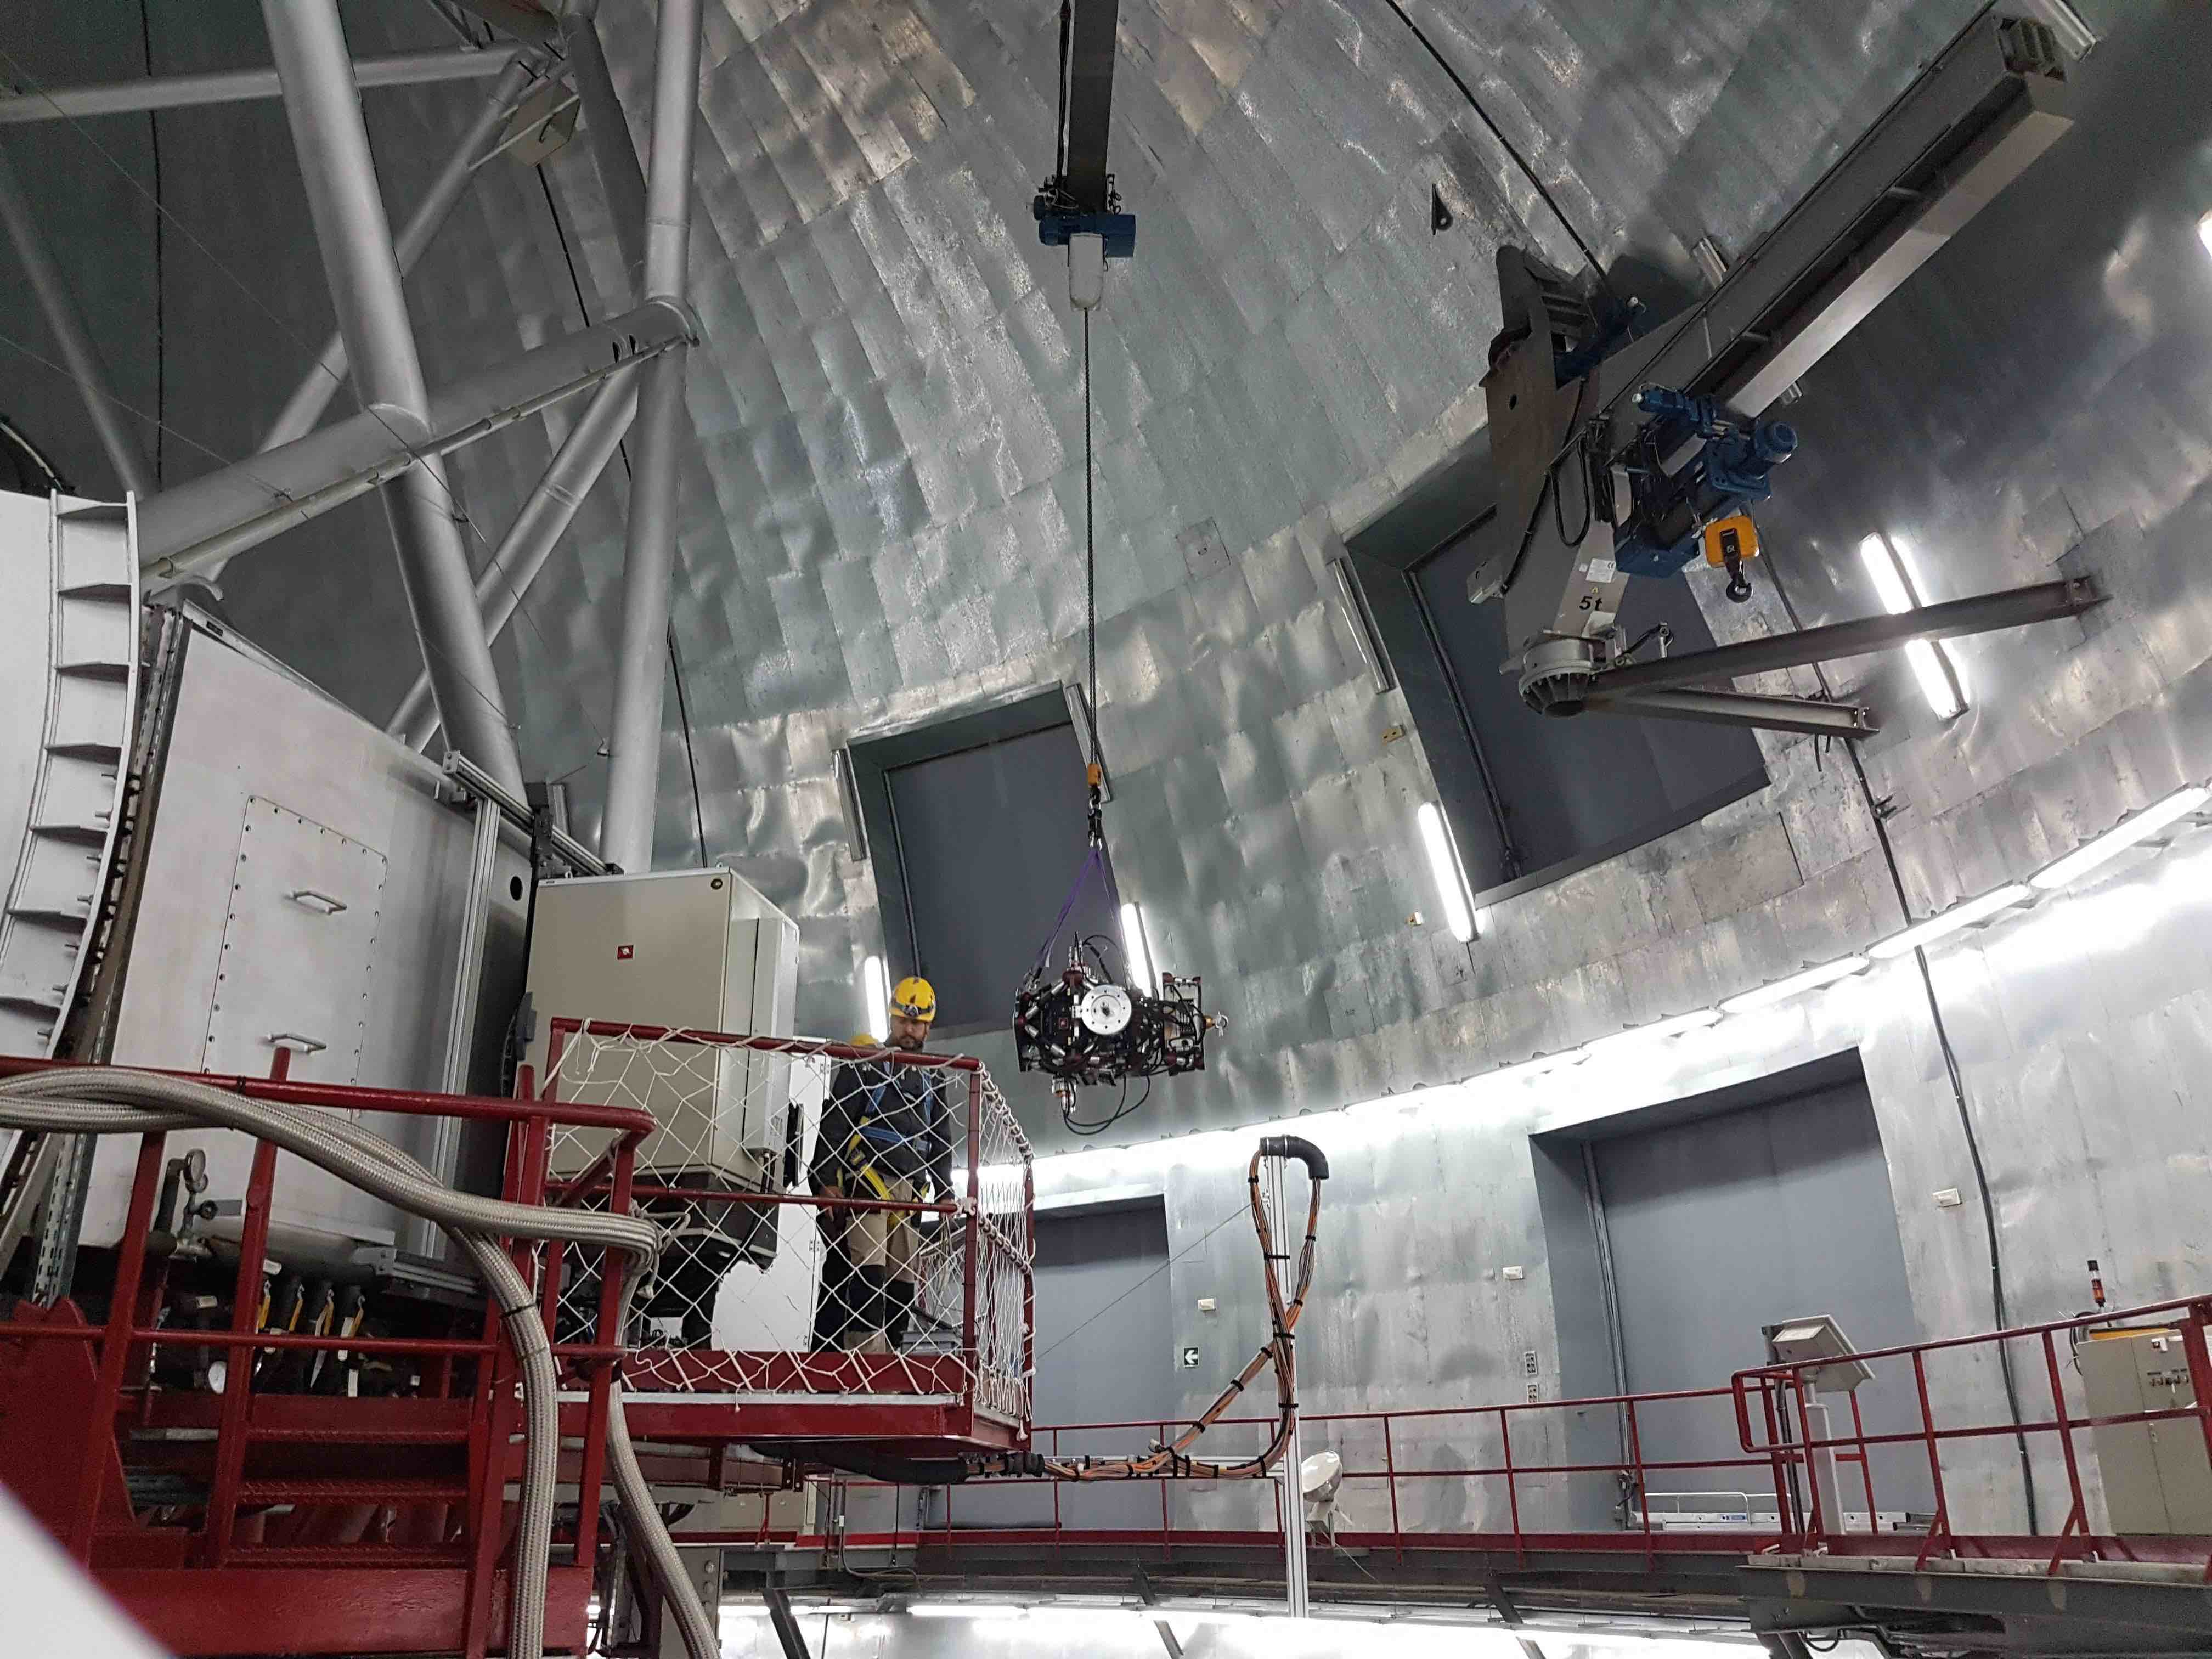
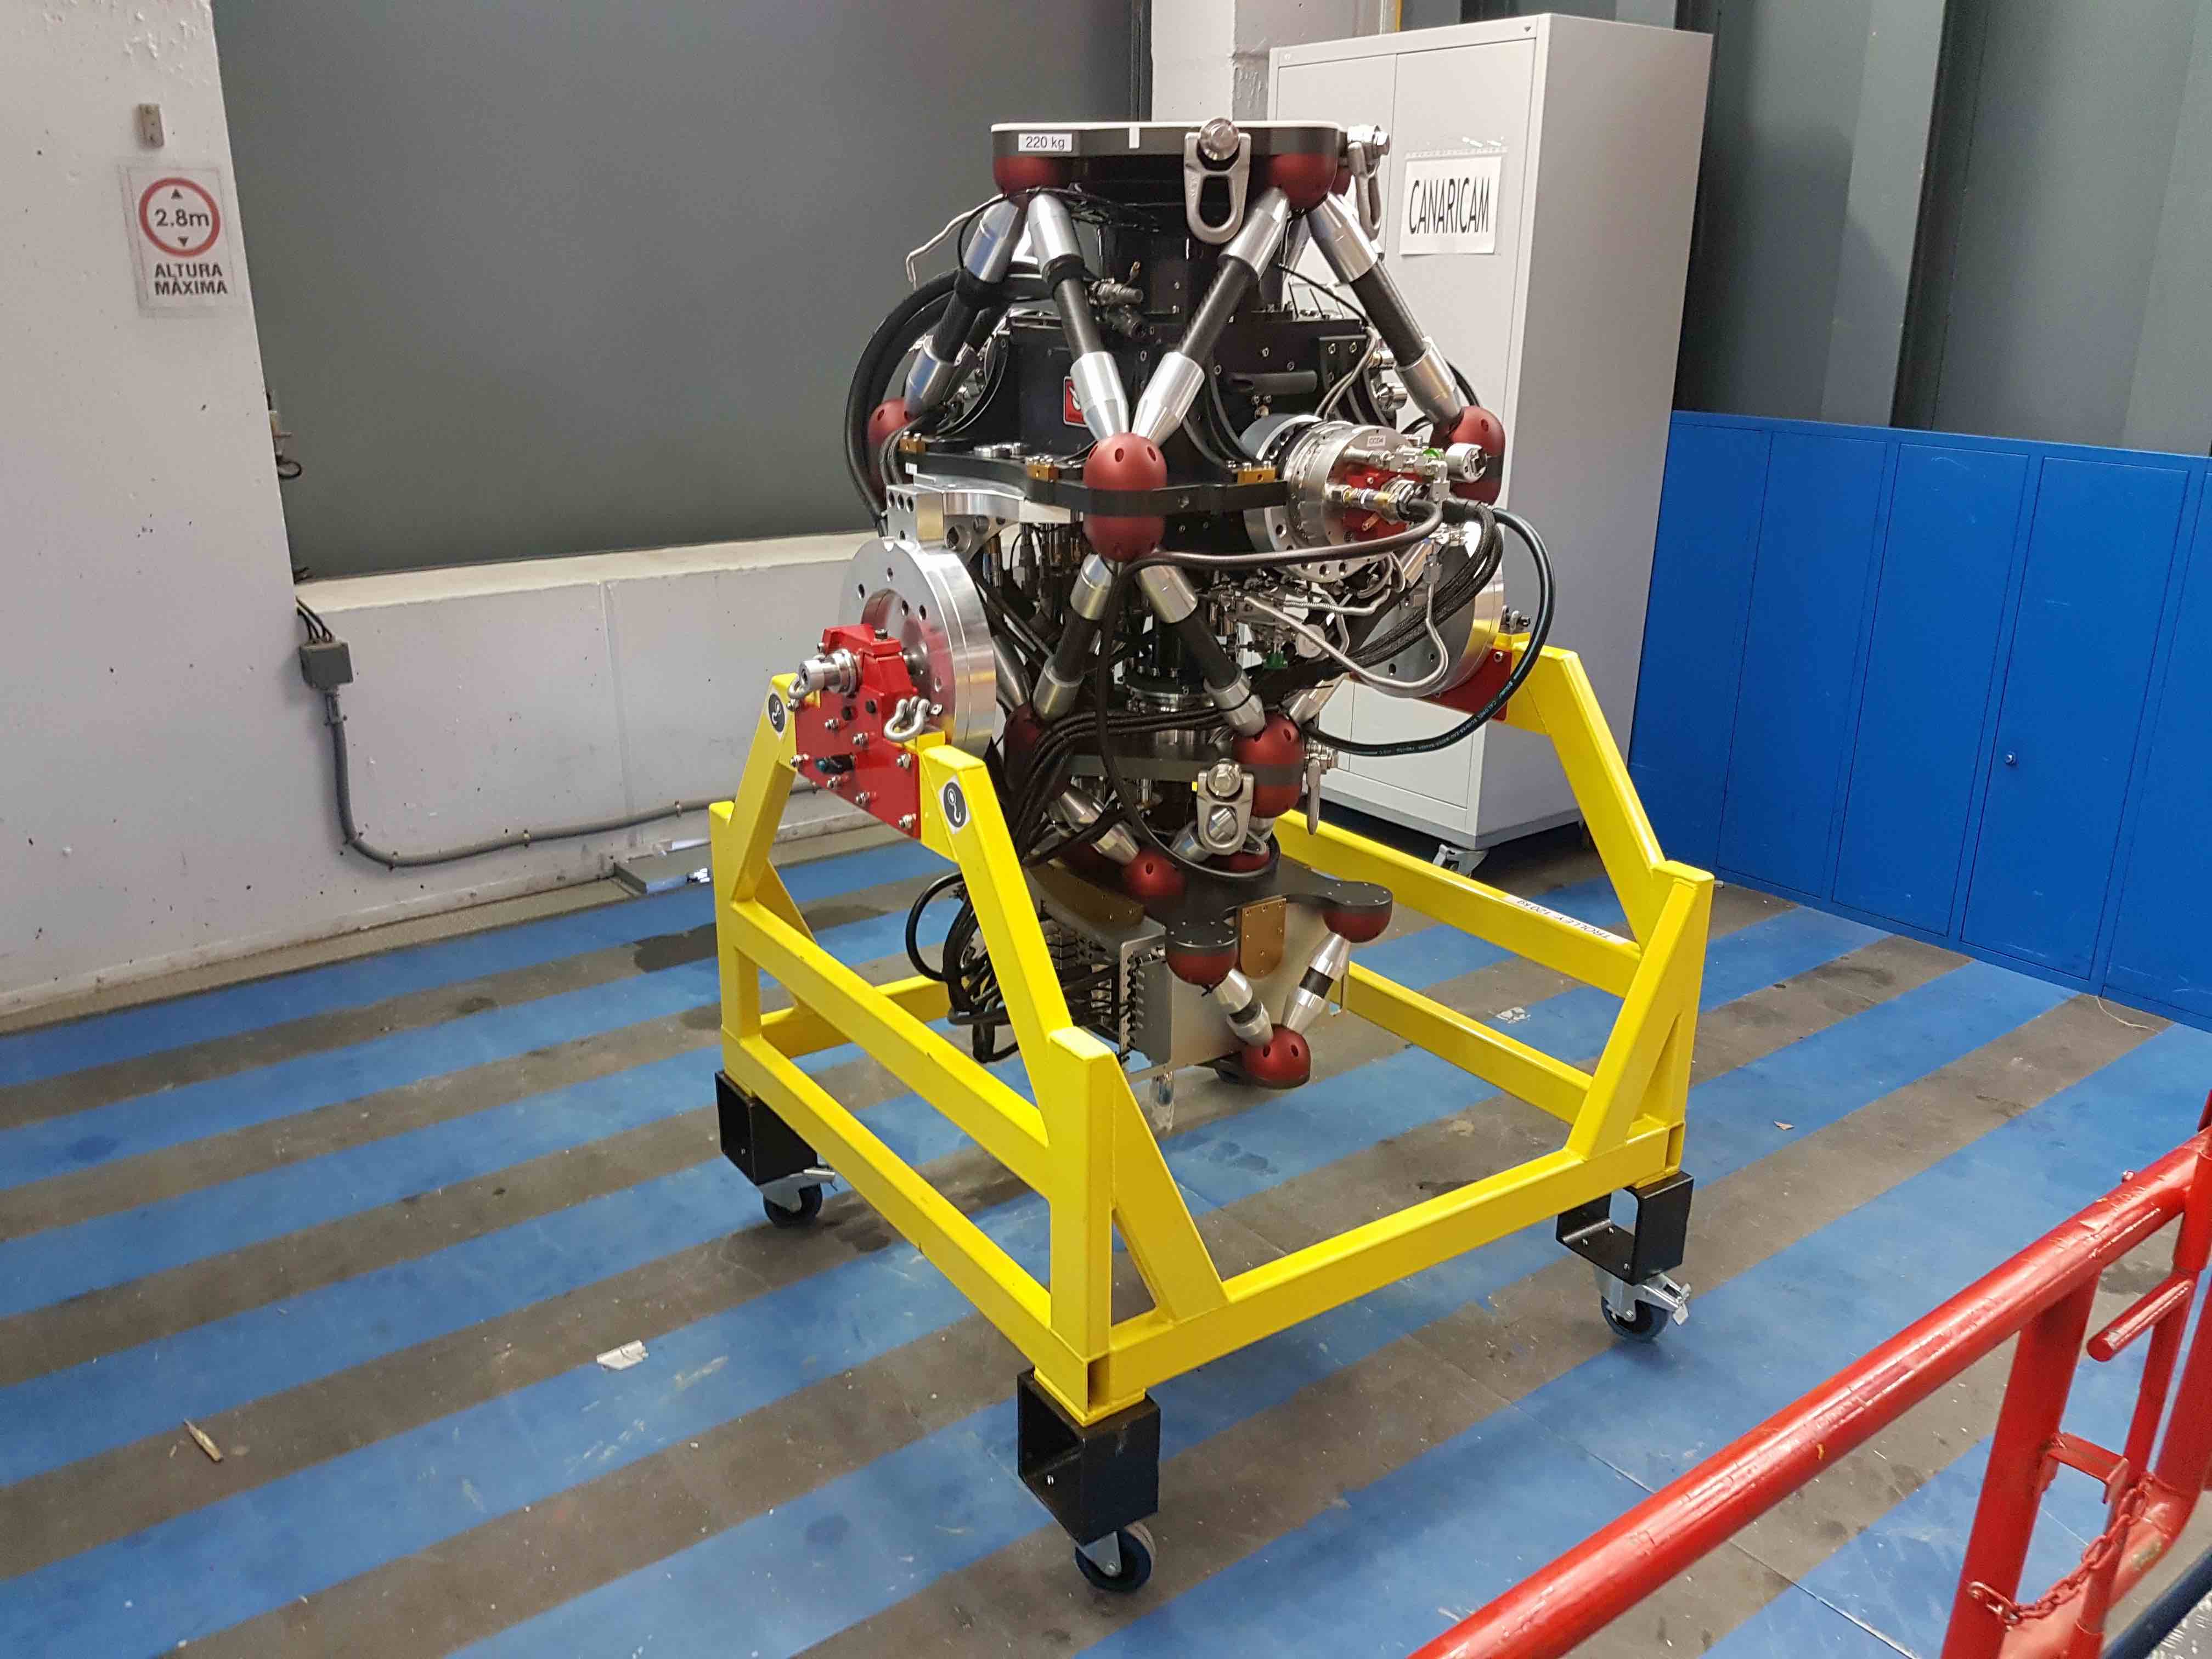
- Lower the instrument to the ground floor to where its yellow handling trolley is sitting. Align the trolley so that the red axle holders are aligned with the axles on the middle plate of HiPERCAM. Then slowly lower the instrument onto its trolley, ensuring that none of the cables and pipes leading to the CCD heads are trapped. When the instrument axles are sitting in their holders, close the red clamps on the axle holders and bolt them shut.

- Lock the wheels on the trolley to prevent it moving around for the next steps.
- Insert the rotation locking pins in the axles, one on each side. This may require the instrument to be rotated a few degrees in each direction until the pins can be inserted.
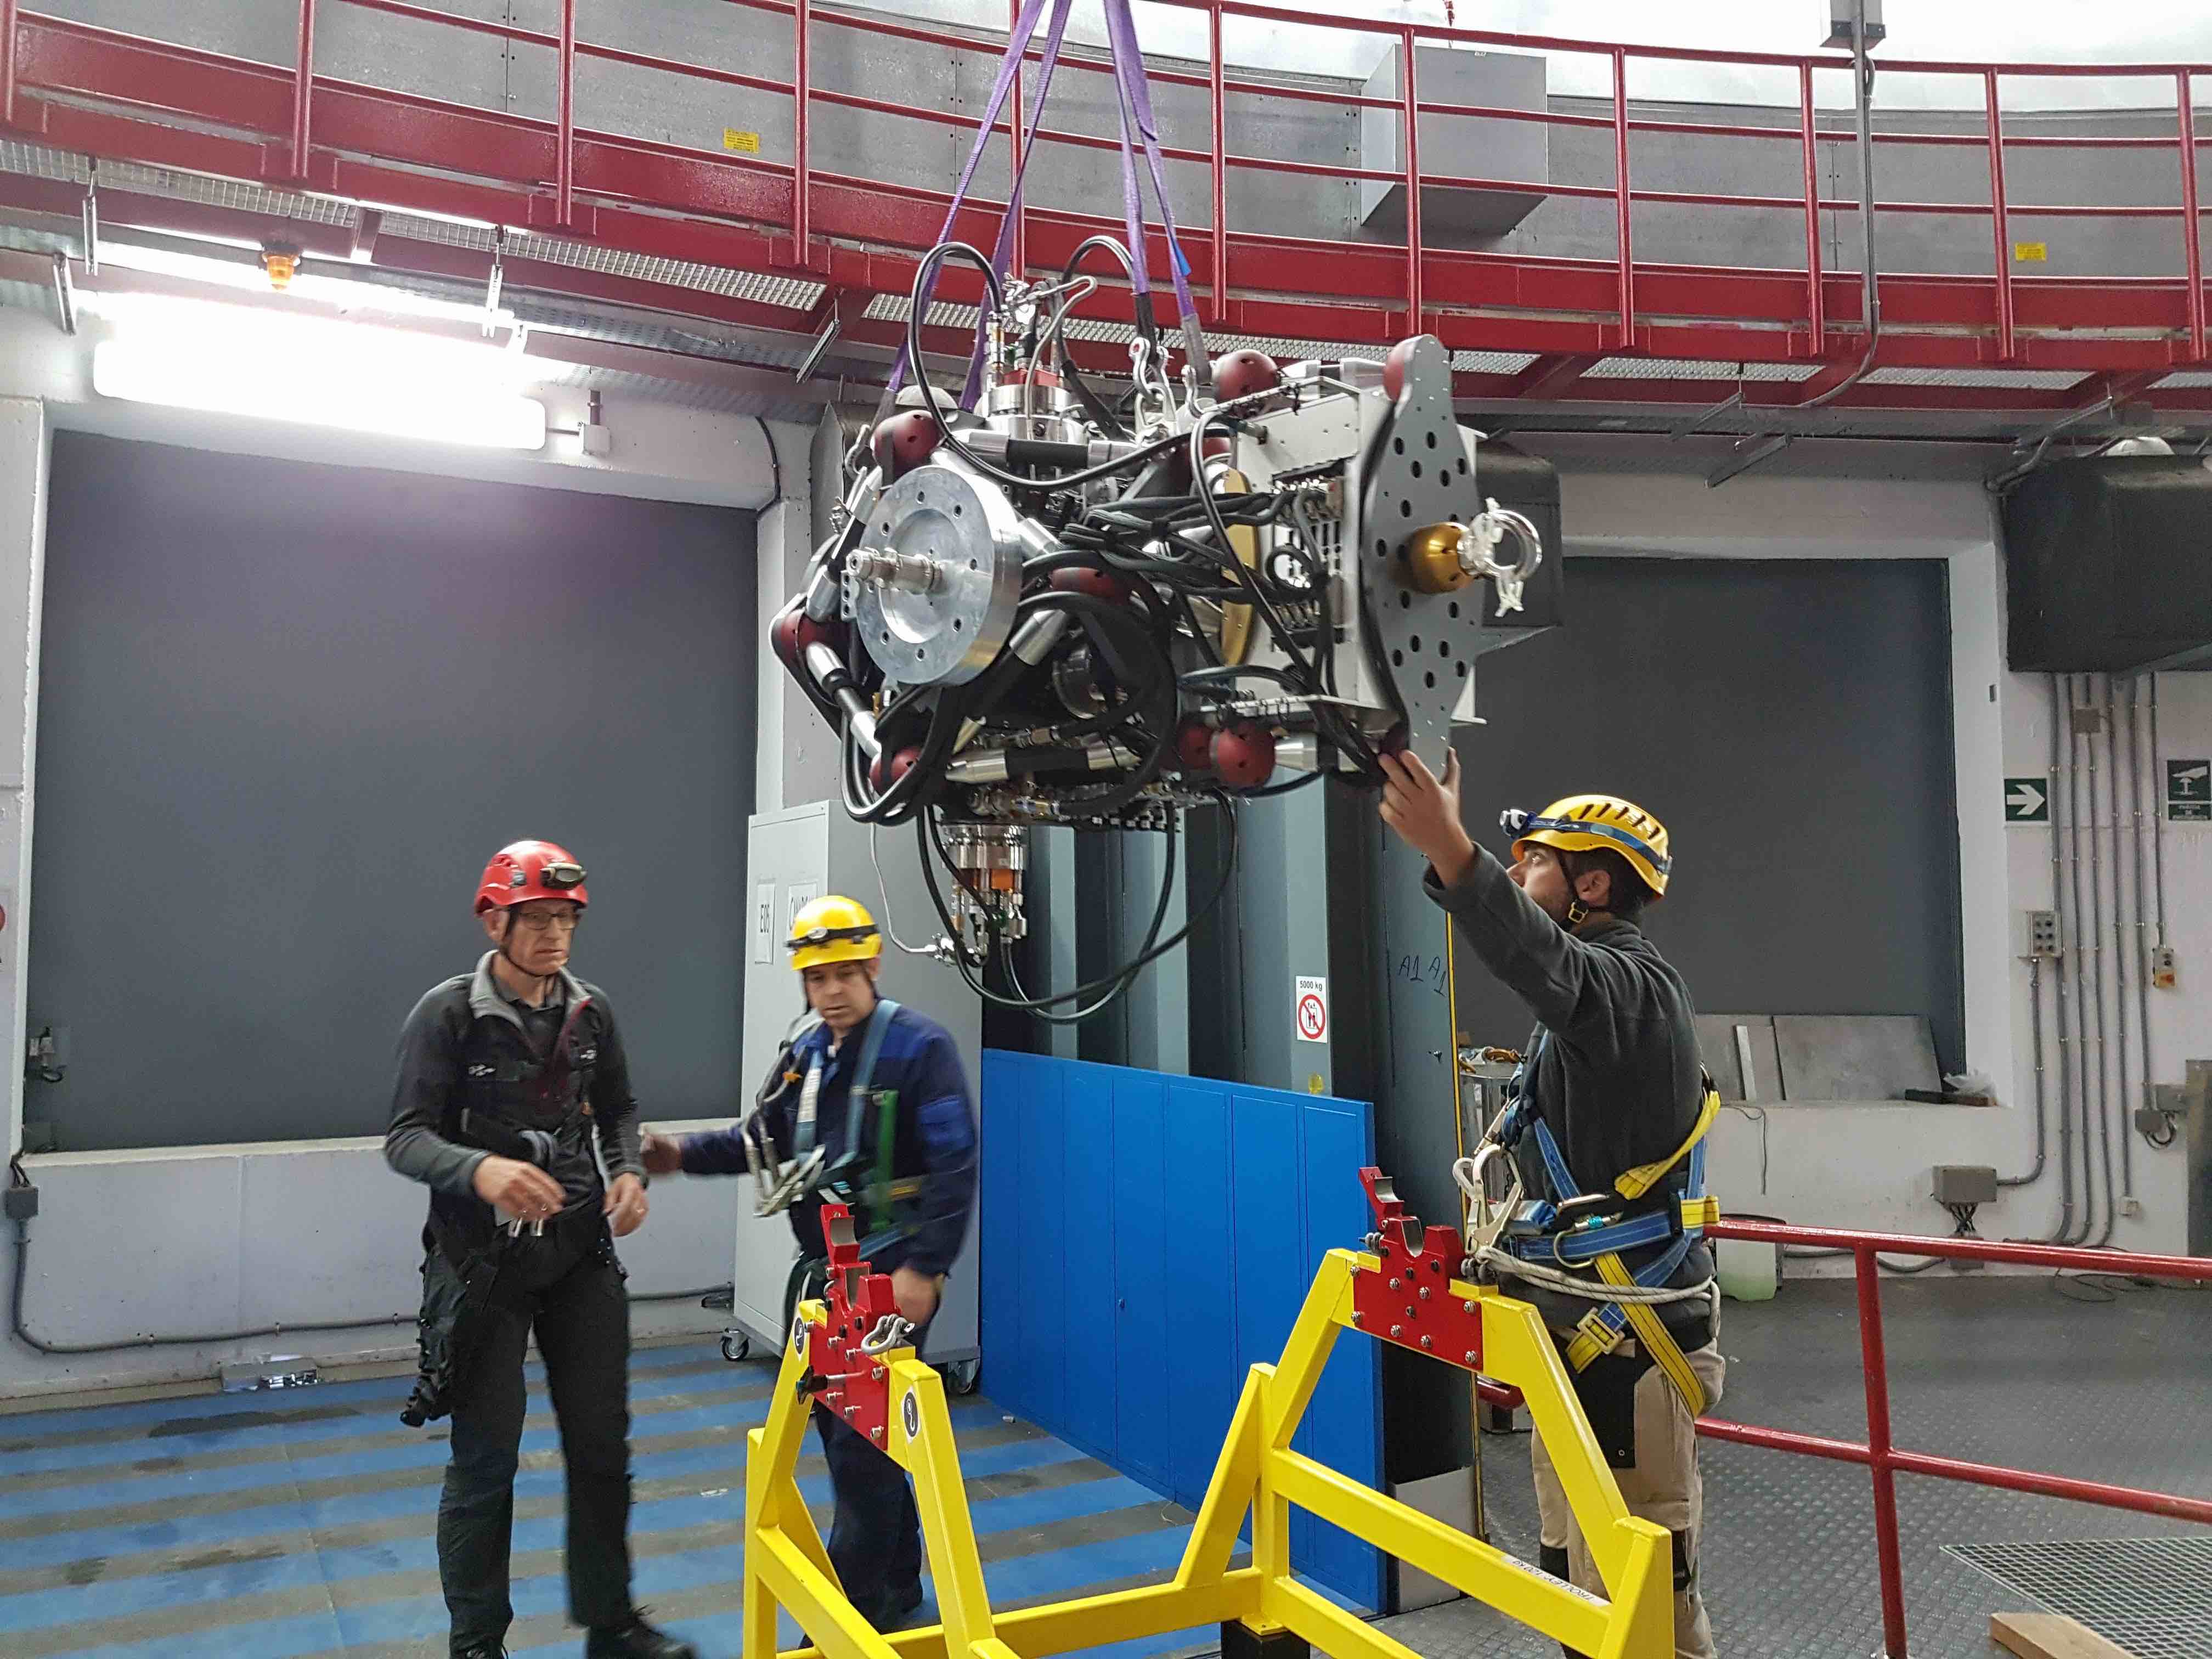
- Remove the crane, scales, slings, shackles and swivel eyelets.
- Rotate HiPERCAM to the vertical position with the CCD controller at the bottom. To do this, 4 people are required - one holding each axle locking pin and one at each end of the instrument. As soon as the locking pins are removed, the instrument will want to tip forward, i.e, the top plate will want to drop down and the CCD controller will want to rise. The instrument is quite out of balance on the axles, so the 2 people holding the ends will have to be prepared to take the weight when the locking pins are removed and then gently push the instrument into the vertical position. Once there, the other 2 people should re-insert the locking pins.
- Unlock the trolley wheels and move trolley to the large lift to take it down to the coude or clean room for storage.
- Once in the coude or clean room, place the two black foam tubes over the two exposed CCD heads to protect them. Then put the black HiPERCAM cover over the instrument, ensuring the top of the cover is sitting centrally on the top plate of HiPERCAM. Place warning signs on the two sides of HiPERCAM on which the CCDs protrude.
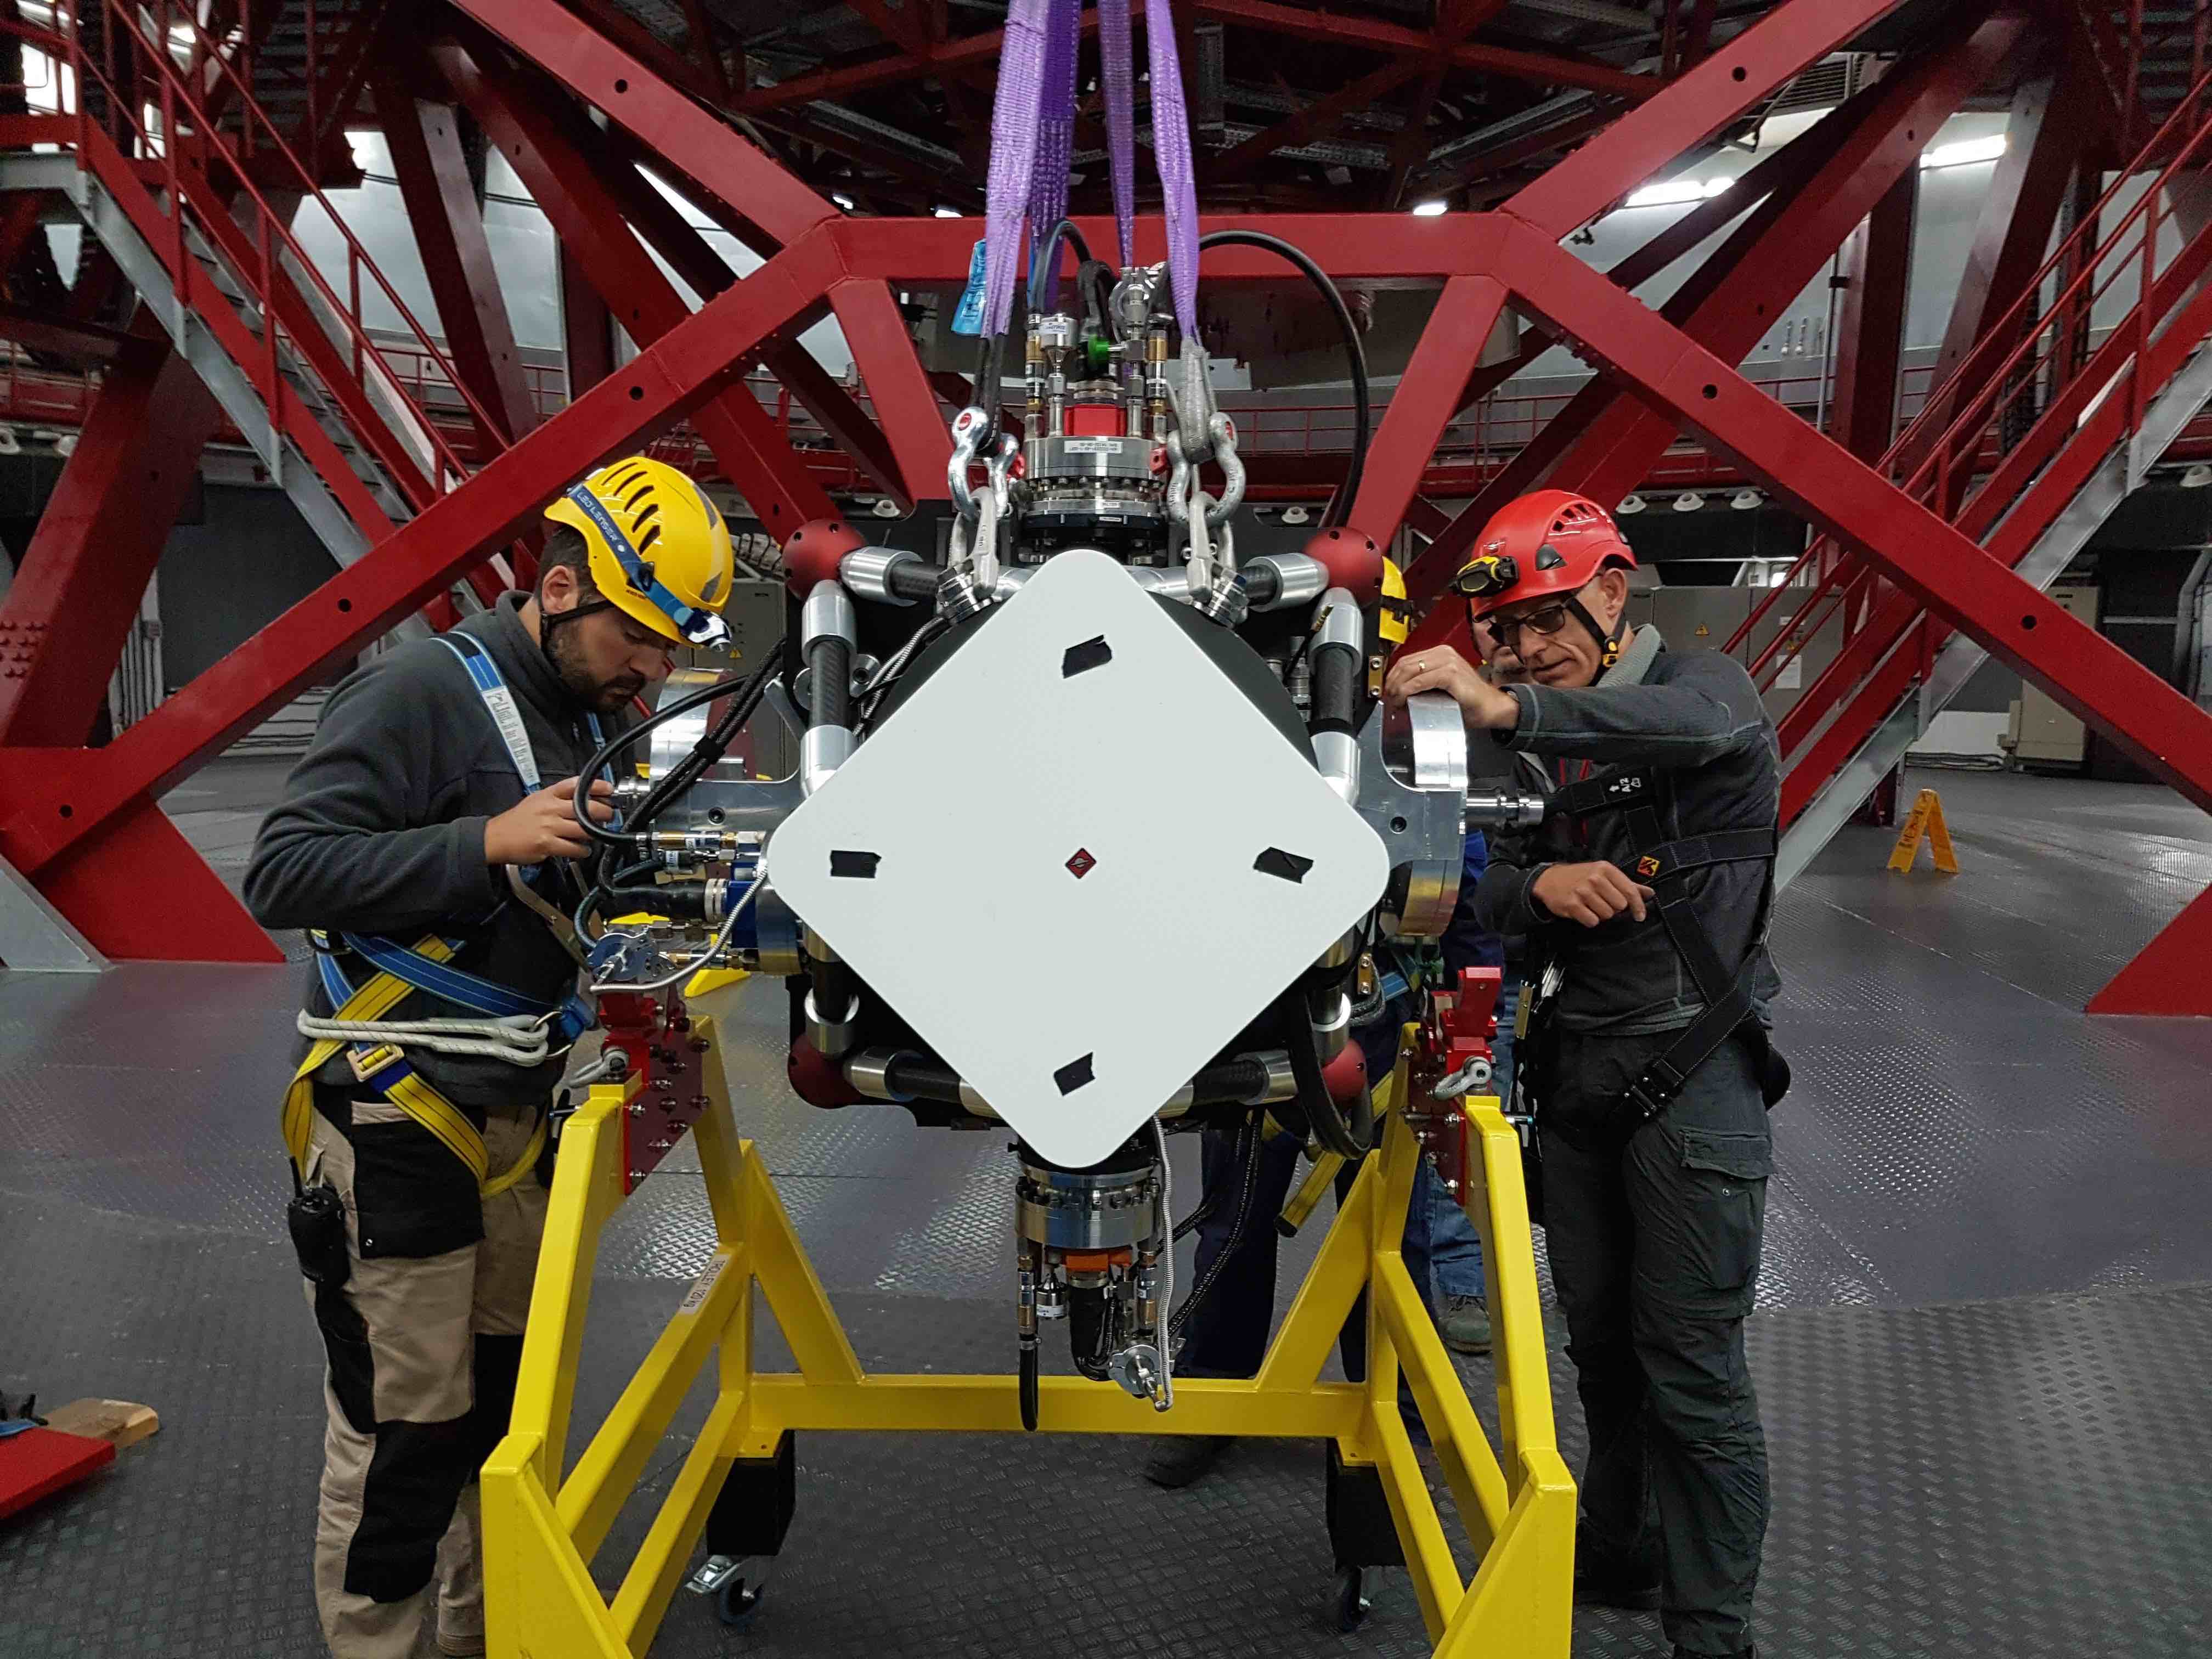
- To remove the HiPERCAM mounting collar from the rotator, first remove the focal-plane slide and blade to prevent damage during handling of the collar.
- Rotate the rotator so that one of the vanes on the collar lies perfectly vertical at the top. Then attach a shackle to the hole in the vane.
- Attach a sling to the shackle on the collar and attach the other end of the sling to the scales, which is itself attached to the hook on the main dome crane.
- Raise the crane until the weight indicated on the scales is equal to the weight of the mounting collar. The weight is given by a sticker on the collar. This ensures that the collar does not suddenly jolt downwards when the last bolt is removed.
- Remove the bolts attaching the HiPERCAM mounting collar to the GTC rotator, ensuring the bolts and washers are all placed in the correctly-labelled bag in the HiPERCAM bolts box.
- When the bolts are all removed, and the mounting collar’s weight is being entirely held by the crane, it will be suspended perfectly vertically. Lower the collar to the ground floor to where its wooden storage box is sitting.
- Ensuring that the from face of the collar is protected at all times by the rubber mat in the storage cate, slowly lower the collar into its crate, shifting the collar towards one side at it drops from vertical to horizontal.
- Put the wooden lid onto the crate and leave in place on the GTC dome floor until the next time HiPERCAM is to be mounted.